Project: VFD Clock
2015-08-08 18:00 - Making
My past two posts have hinted at the project that I've just "finished" (final notes on that towards the end). It was the confluence of a few things. Besides, of course, generally enjoying my recent work in electronics projects, first I wanted to try a new microcontroller. I've used Arduino, and designed projects directly around the ATMega microcontroller it's based on. While it's great within its sweet spot, there's very little room to grow past its maximum limits (32 kB flash, 2 kB ram, 23 GPIO pins, 20MHz). Its maker, Atmel, has some bigger chips, but if you're going to switch from the Arduino world, why not go far afield? I picked the STM32 line, which has one especially nice feature: hardware supported interactive step-through debugging.
But I needed a practical project to apply it to. When I discovered the "IV-22" VFD (vacuum fluorescent display), I had it picked: a clock. Not a super complicated project, but I've had fun with it, and I'll end up with a curious looking thing to leave on my desk at work. These tubes are unusual in their shape and look, which I like.
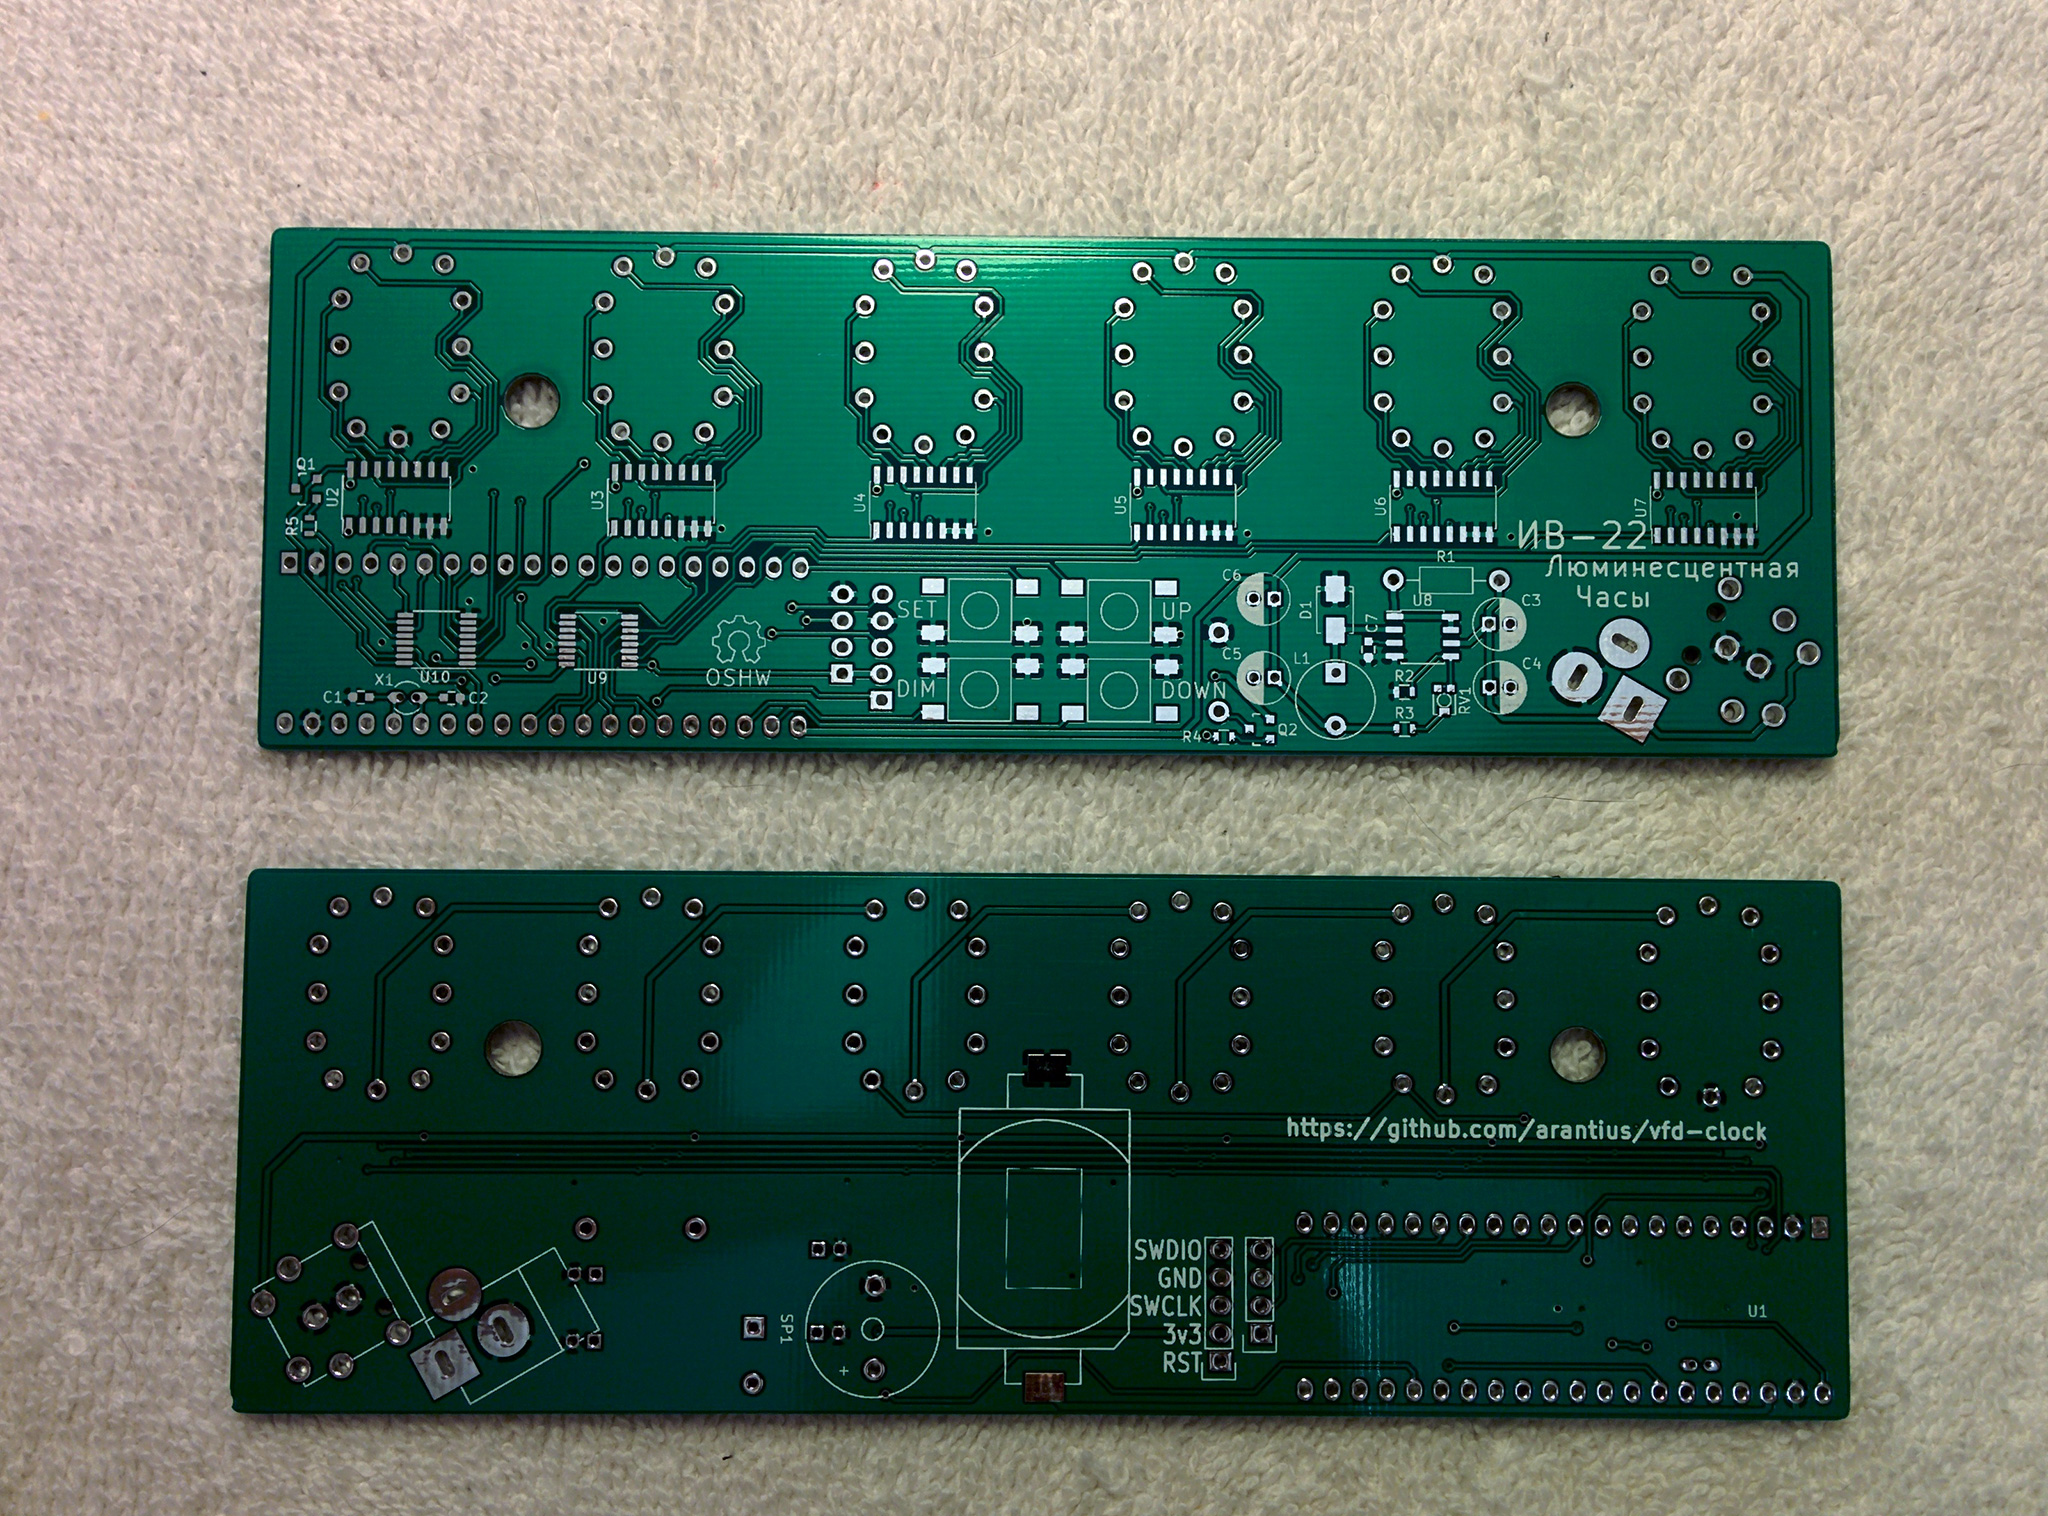
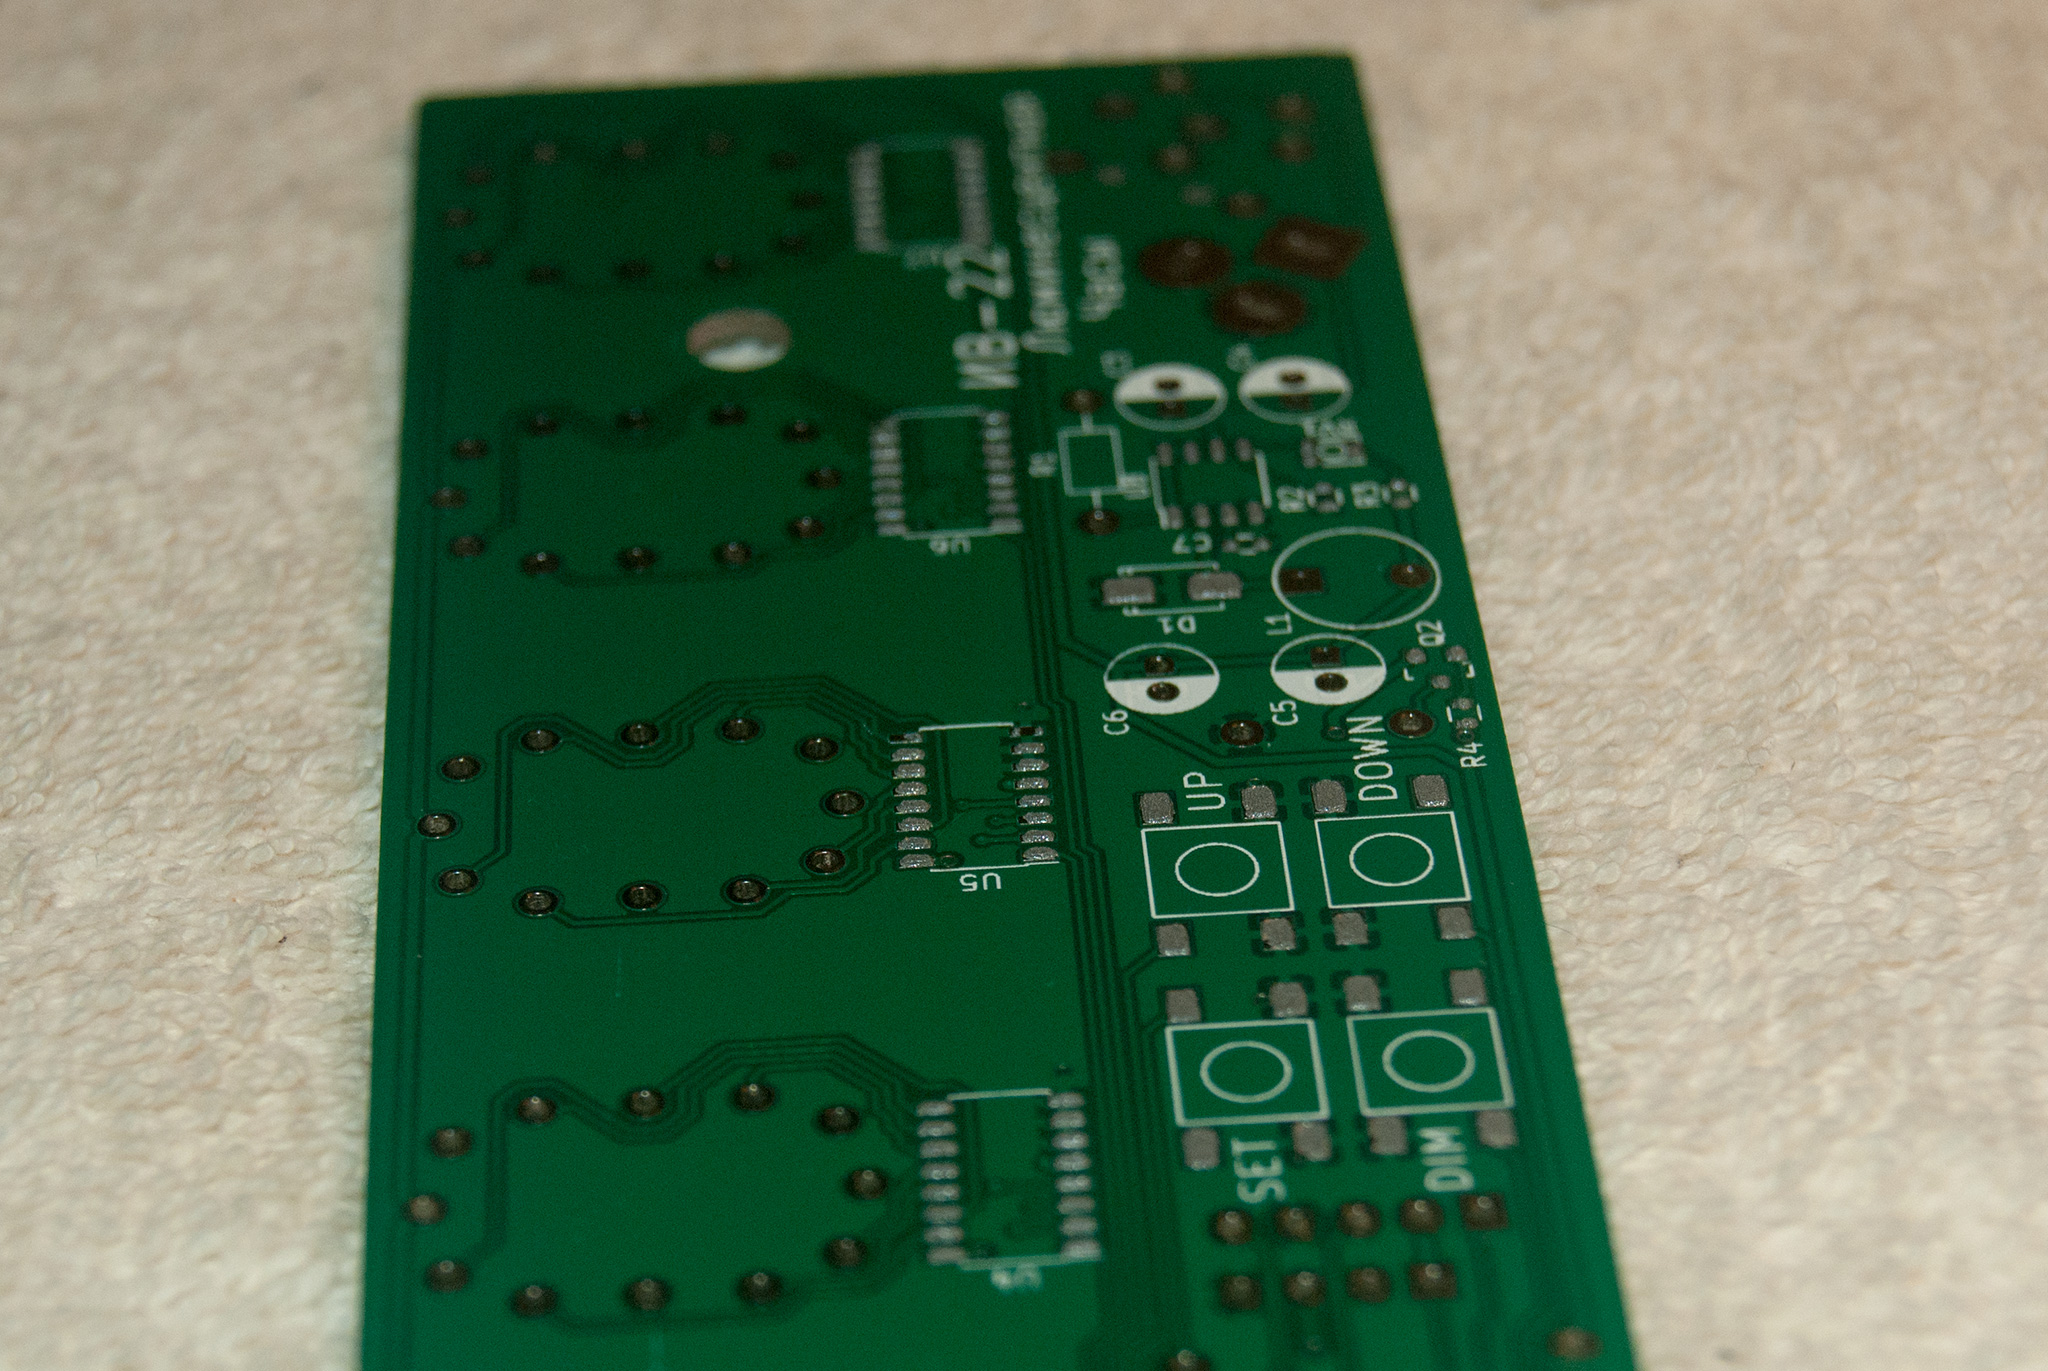
Here's the PCB I designed for this project. It's the biggest I've ever had made, but much of that space is taken up to hold the tubes across the top and little else. There's lots of surface-mount parts covering the rest of the front of the board. Step one is to apply solder paste to attach them. I laser cut a stencil out of plastic, and squeegeed the paste over it with an old credit card. If you look closely, you can see a few spots I missed, like the far pads of chip U5 near the middle. These were touched up by applying a bit more paste with a toothpick. There were only a small handful of these errors.
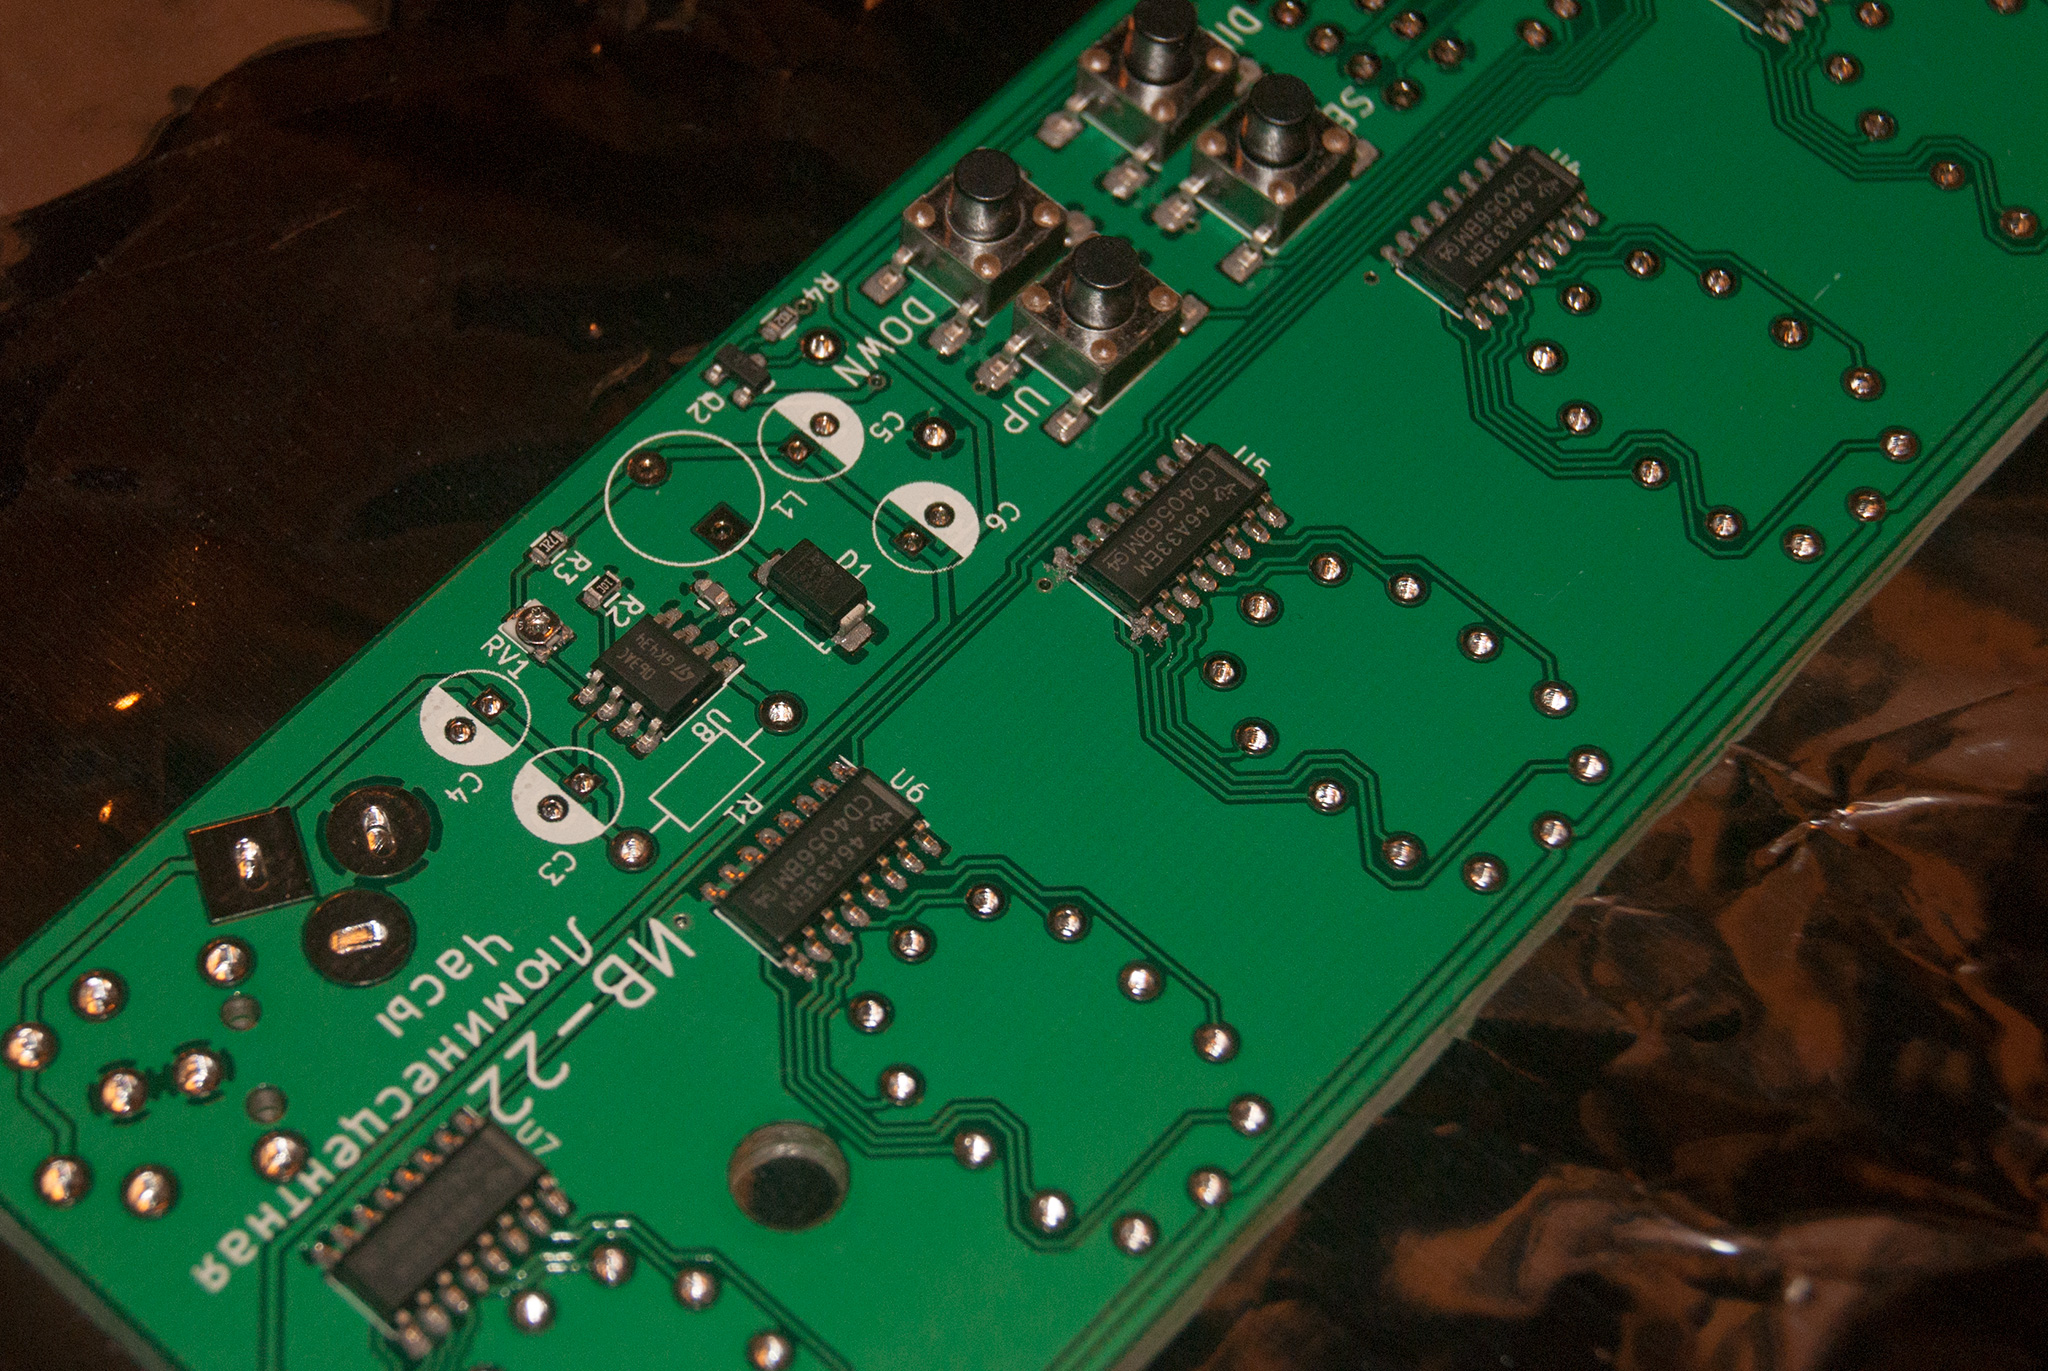
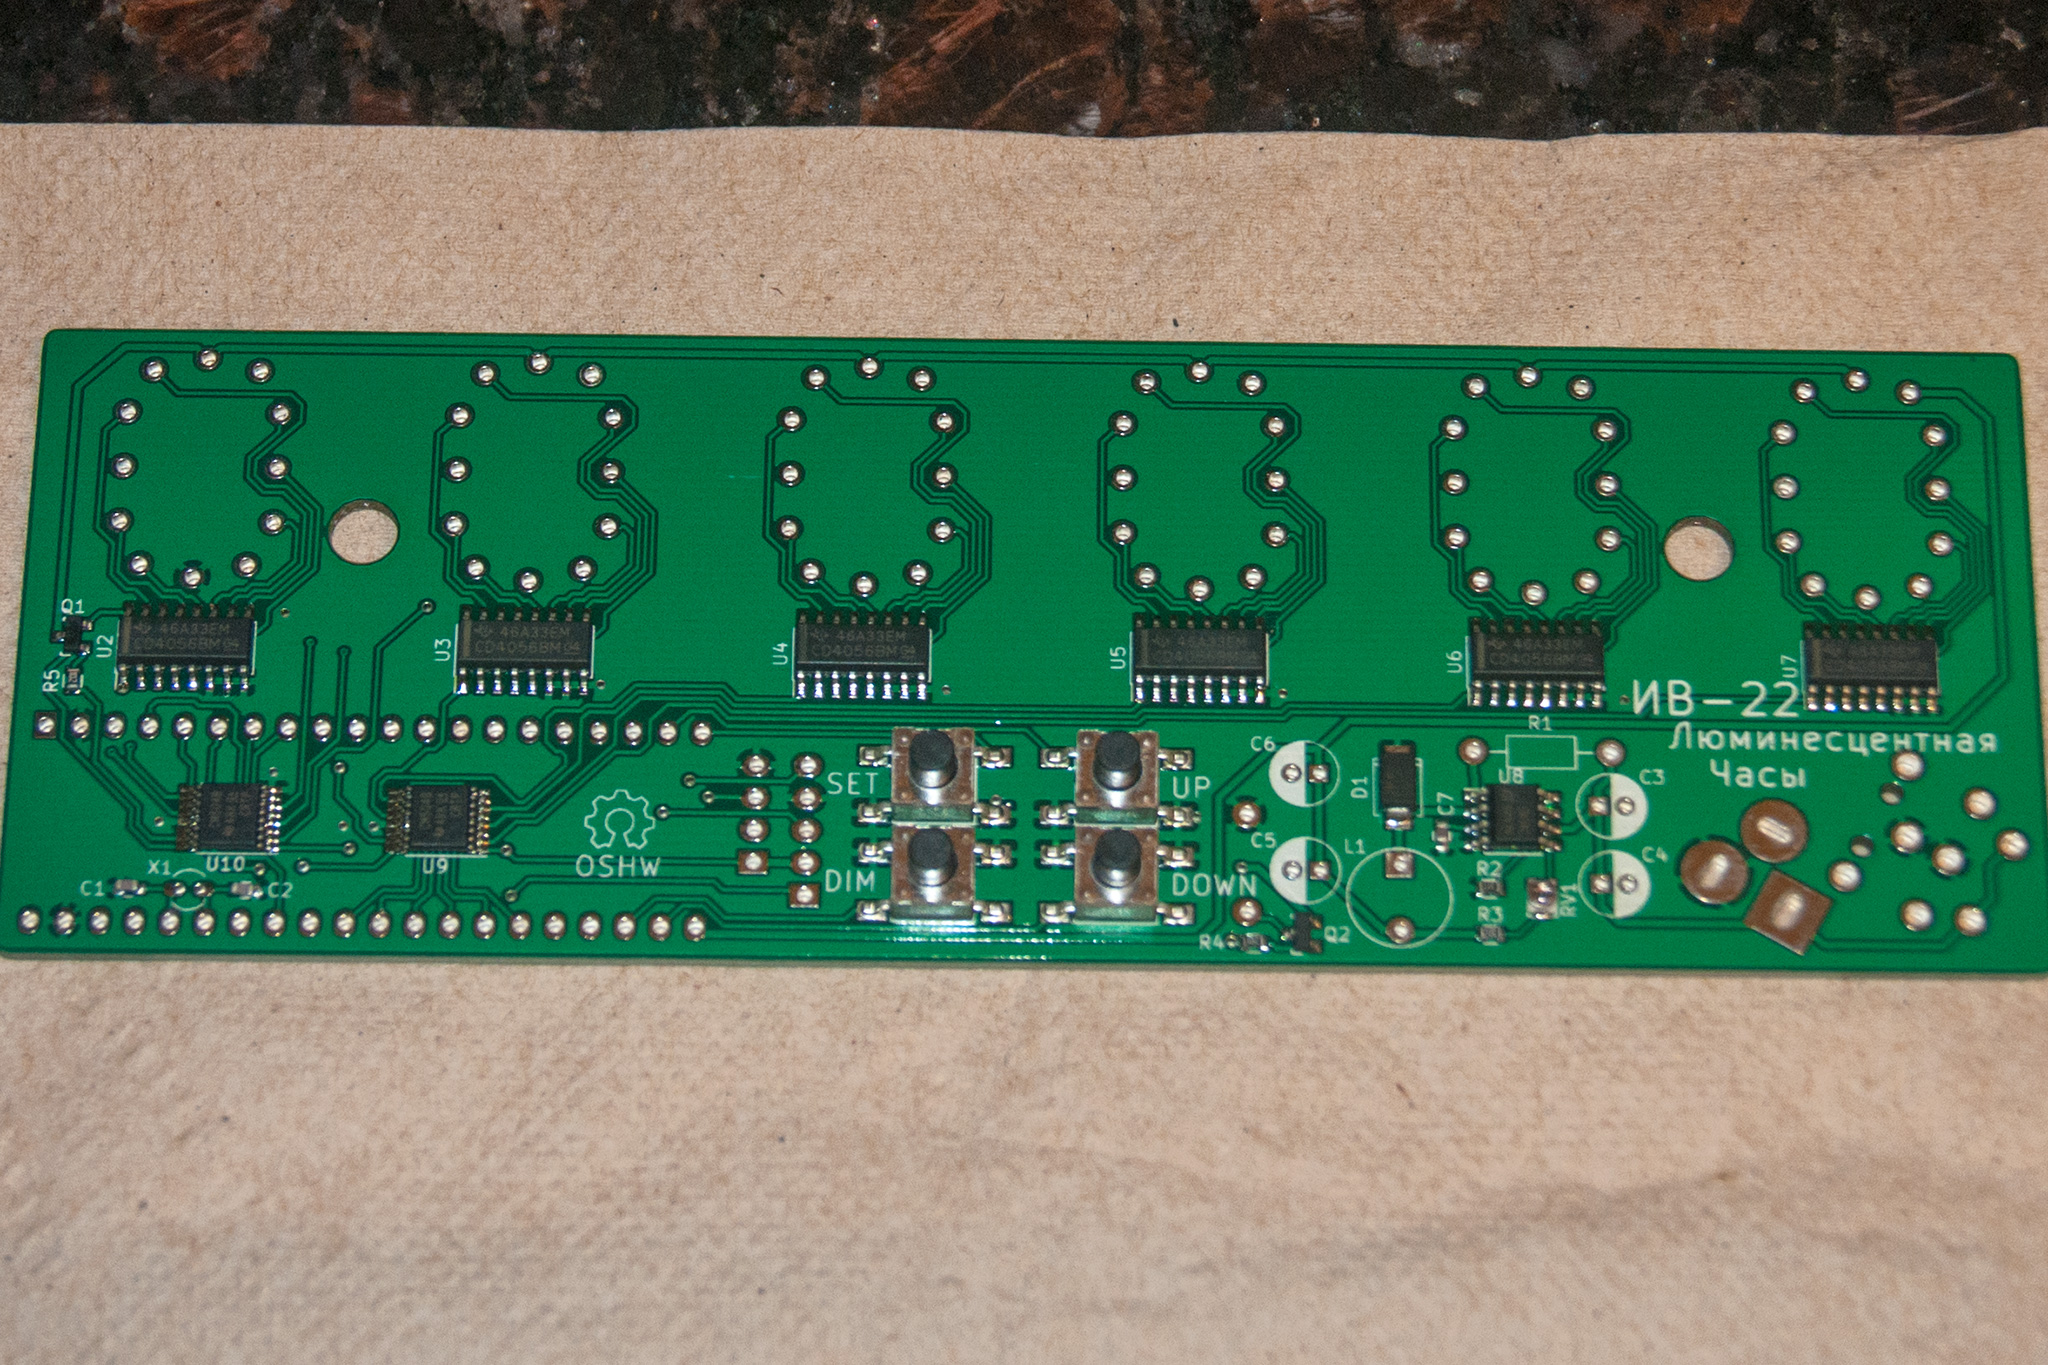
Solder paste is quite a bit like toothpaste, except it's toxic and grey. It's just sticky enough that the parts can simply be placed onto it, and they stay put where they need to be. The first picture shows after this step is completed. A good set of tweezers helps you lift each of the parts (some being very tiny!) into place correctly. The picture on the right is after the soldering process, which in this case just meant putting the whole thing in a skillet on the stove. Look closely again at U5 and you can see that the spots I needed to touch up by hand leave just a bit of solder residue scattered around, but otherwise everything is tight and clean, looking quite professional. After this was a lot of work to solder in the rest of the through hole components one by one.
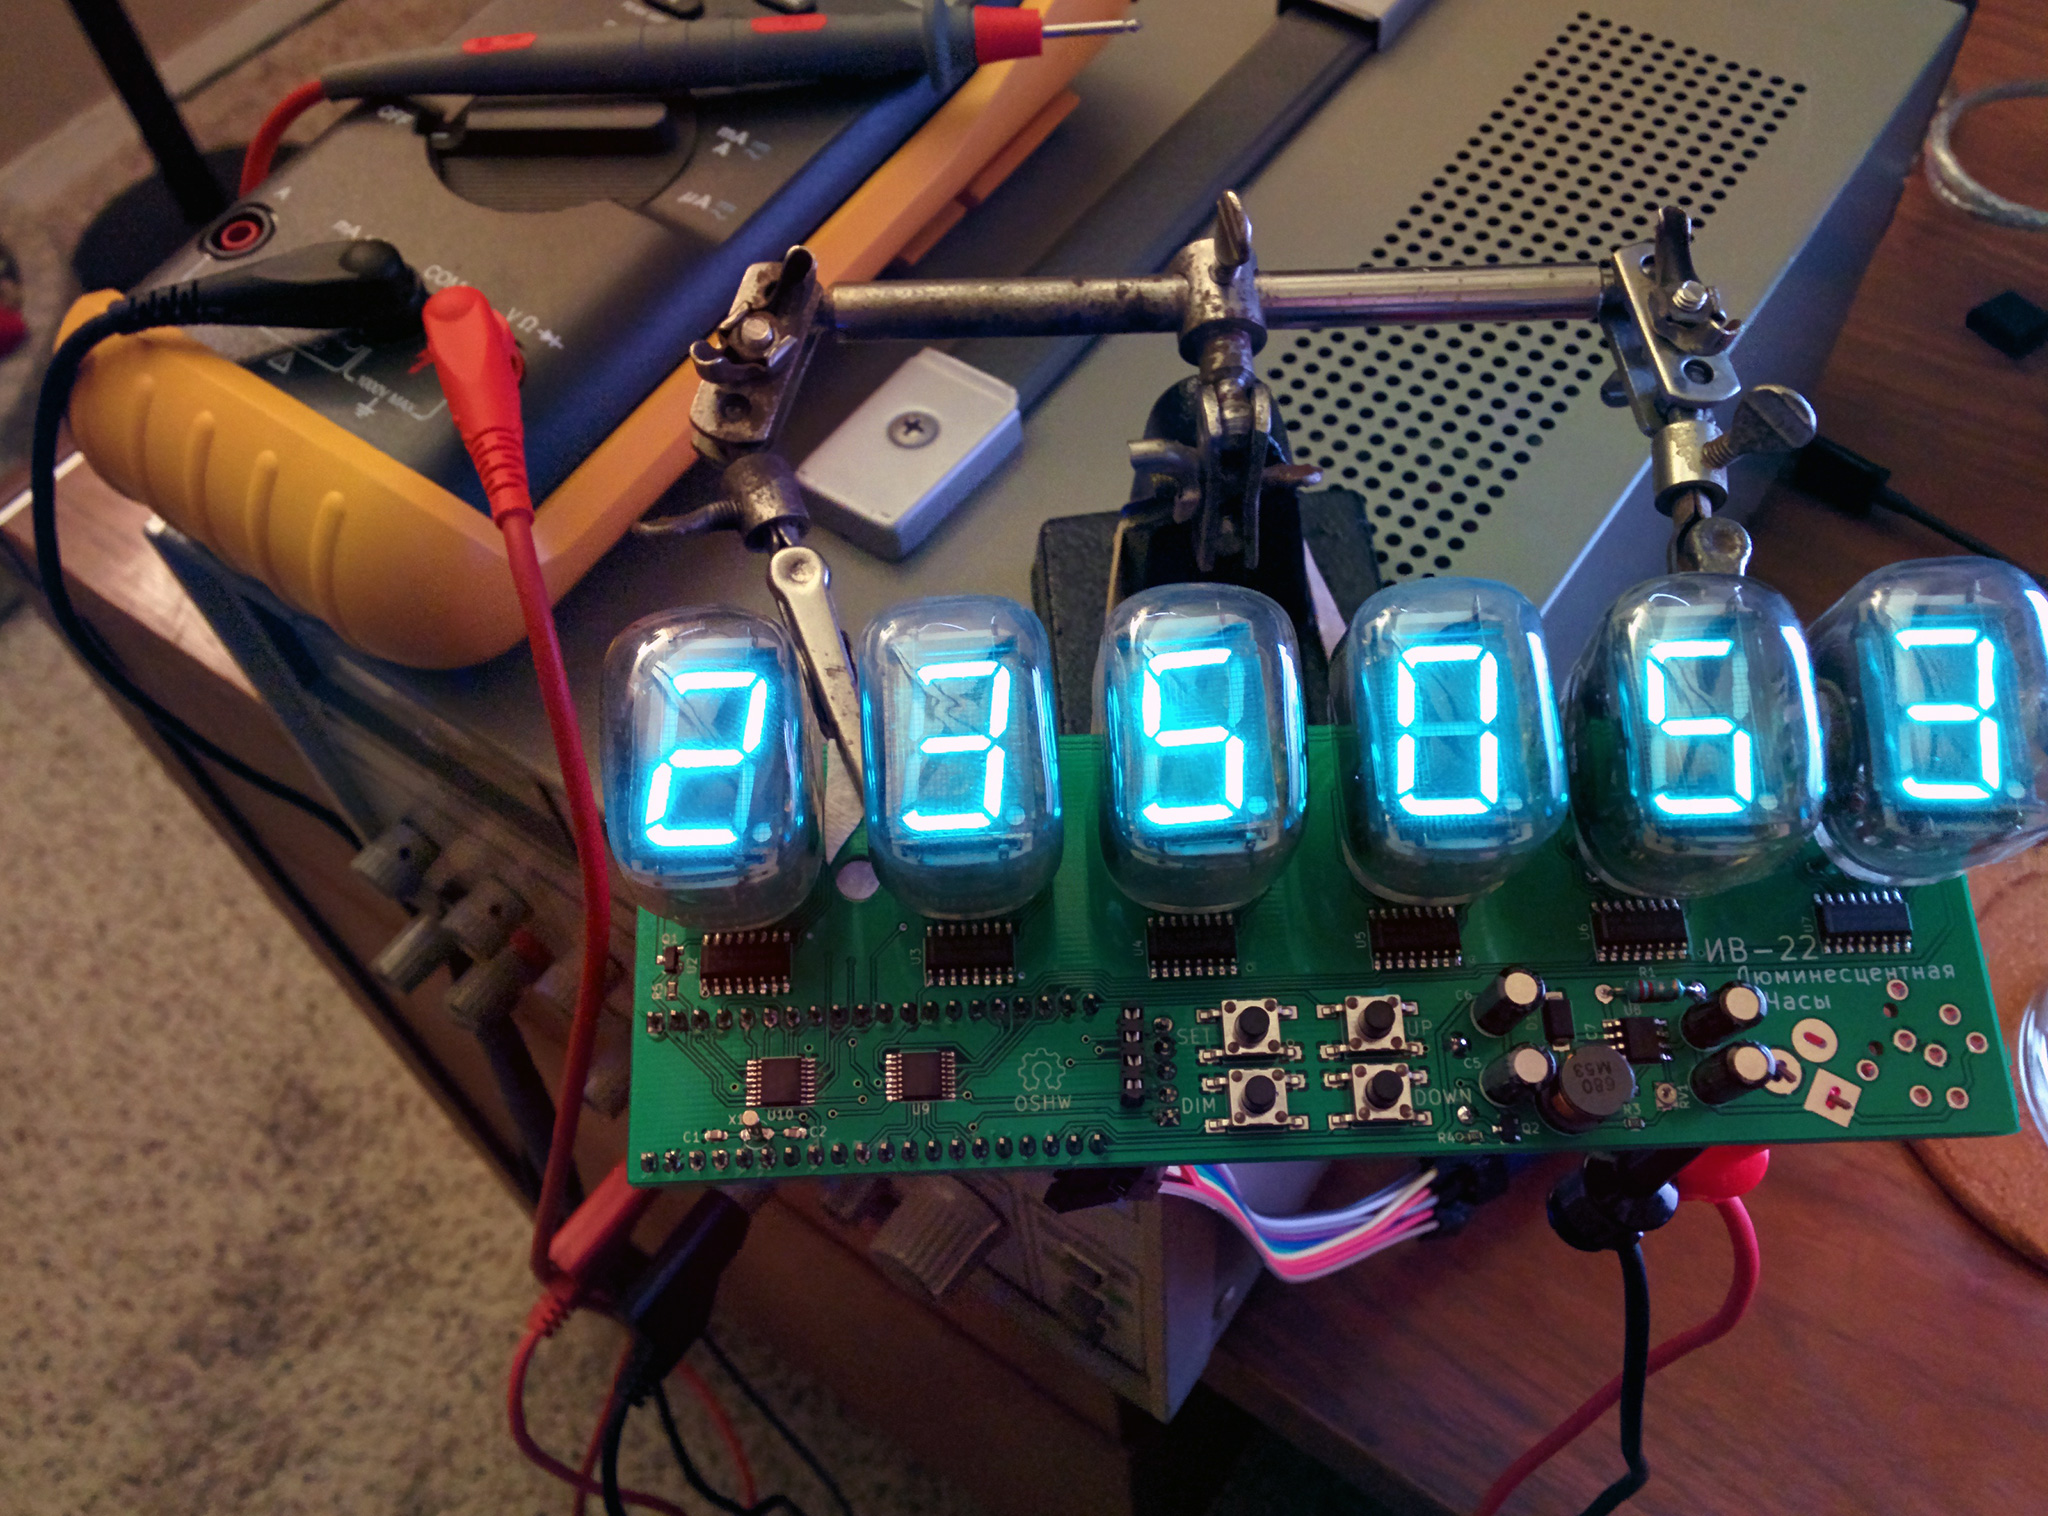
Finally, here it is turned on and working. It's very difficult to photograph. On screen the digits look washed out, but in person they're clear and easy to read.
It's not truly done yet though. The plastic stand is not the right shape to both support it and also not be placed in the middle of something else, so that needs tweaking. I currently can't fit the power cord into the jack with the legs installed. I'm also only mostly done with the software part of it. While the new STM32 chip is much more powerful, with lots of great features, it's also very hard to work with. Documentation is often dense and difficult to comprehend clearly. I've worked through several little things where I felt stuck for a while, then after several tries and several returns to the internet to discover new information, finally I figure it out. Right now I'm stuck on getting the time data to work from the battery backup while power is disconnected. I should be able to do this, and I think it should be easy. But it's not. It will take time to figure out the secret detail that I don't quite know yet.