Topic: Making
2024-07-26 11:56 - Making
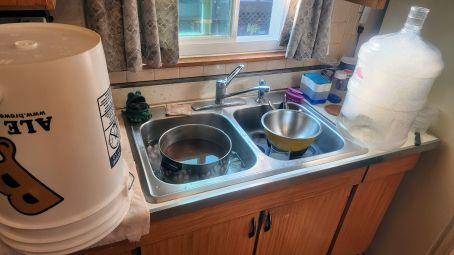
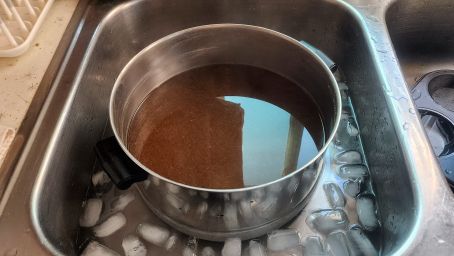
I don't drink a lot, but some. Recently I got it into my head to try home brewing. After a while I picked up some cheap used equipment, and supplies including an easy ingredient kit at a local home brew shop. I've just barely completed the steps for my first brew, here's how it went. Above was the result of brew day: After boiling the malt extract and hops I had the wort, here pictured cooling down in the sink. Beside that are two fermenters: a pail and a jug style. I started with the jug. (Which is capable of a 5 gallon brew, but for my first go I did a one gallon batch.) In the first picture you can see it full of foam. That's the no rinse sanitizer. Brewing is all about convincing some yeast to work for you, and just about the most important part of that is keeping out the bacteria that want to ruin things. You don't rinse the sanitizer because if you did, it would introduce more new bacteria!
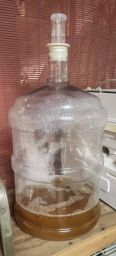
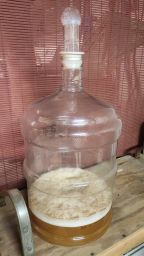
Once the wort was cooled down enough to not kill it, I pitched the yeast in and set up the airlock. The yeast will "fart" out a bunch of CO2, which needs to escape the fermenter (or otherwise the pressure will eventually explode). The airlock lets the CO2 out without letting anything else (bacteria!) in. Above you can see day one: some of the sanitizer foam is sitting on top of the wort. By the next day plenty of yeast has grown, and has bubbled some sanitizer out of the airlock. For this first go I was trying to follow the kit's instructions as closely as possible, but here's where it went wrong.
It takes a fair deal of time for the yeast to do their work. I had read up ahead of time, and had it in my head that about one week was the right time for this fermentation step to take. The instructions want me to do a secondary fermentation (which per my reading is not terribly common), but I did it. However I missed a detail: the instructions wanted primary fermentation to be 4-6 days and (emphasis theirs) before it completes — but it only said that in a note on the side, which I missed. I had been checking more or less daily, and ended up switching to secondary on day 5, but I believe it was too late. The instructions told me to wait "about two weeks" for secondary fermentation, but daily monitoring showed absolutely no activity. So I cut it short after just one week.
So after carefully sanitizing everything involved again, I transferred the beer (I think it is indeed beer now, not just wort) to the bottling pail. (It's got a narrower outlet, which the hose fits on, and more of a siphon inlet. The fermenter pail simply has a hole, a bit above the bottom, to facilitate transferring the liquid but not the sediment.) And bottled! The

Here's bottling day, complete. I planned to use a couple capped bottles (for longer term storage/comparison) but focused on my flip-tops. But did the math in my head wrong so I had extra bottles, which is better than too few! One of the more subtle steps of bottling day is to actually add a bit of sugar to the beer. The remaining yeast processes this, in the bottles, to add carbonation. So although I'm "done", the instructions say I should wait two weeks (and up to an extra week!) for this bottle conditioning to complete. Almost there!
My one gallon kit filled about ten and a half bottles. Or, a bit less than two six packs. This does not excite me, but a five gallon brew can be done easily for the price of two or three (quality) six packs, and if I shop carefully, for less than a (cheap) 15 or 18 pack. Assuming my first results here are good, I'll be aiming in that direction. Though, I'm still figuring out how/whether I can handle boiling five gallons all at once. (I think you can get away with boiling less, then topping up with more water after.) Also: five gallons is a lot of beer to drink!
2024-04-22 16:51 - Making
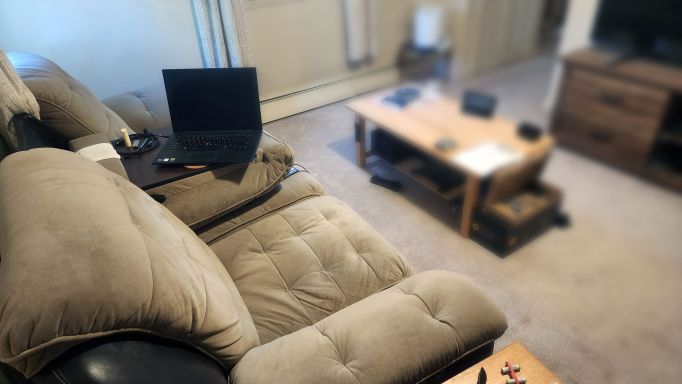
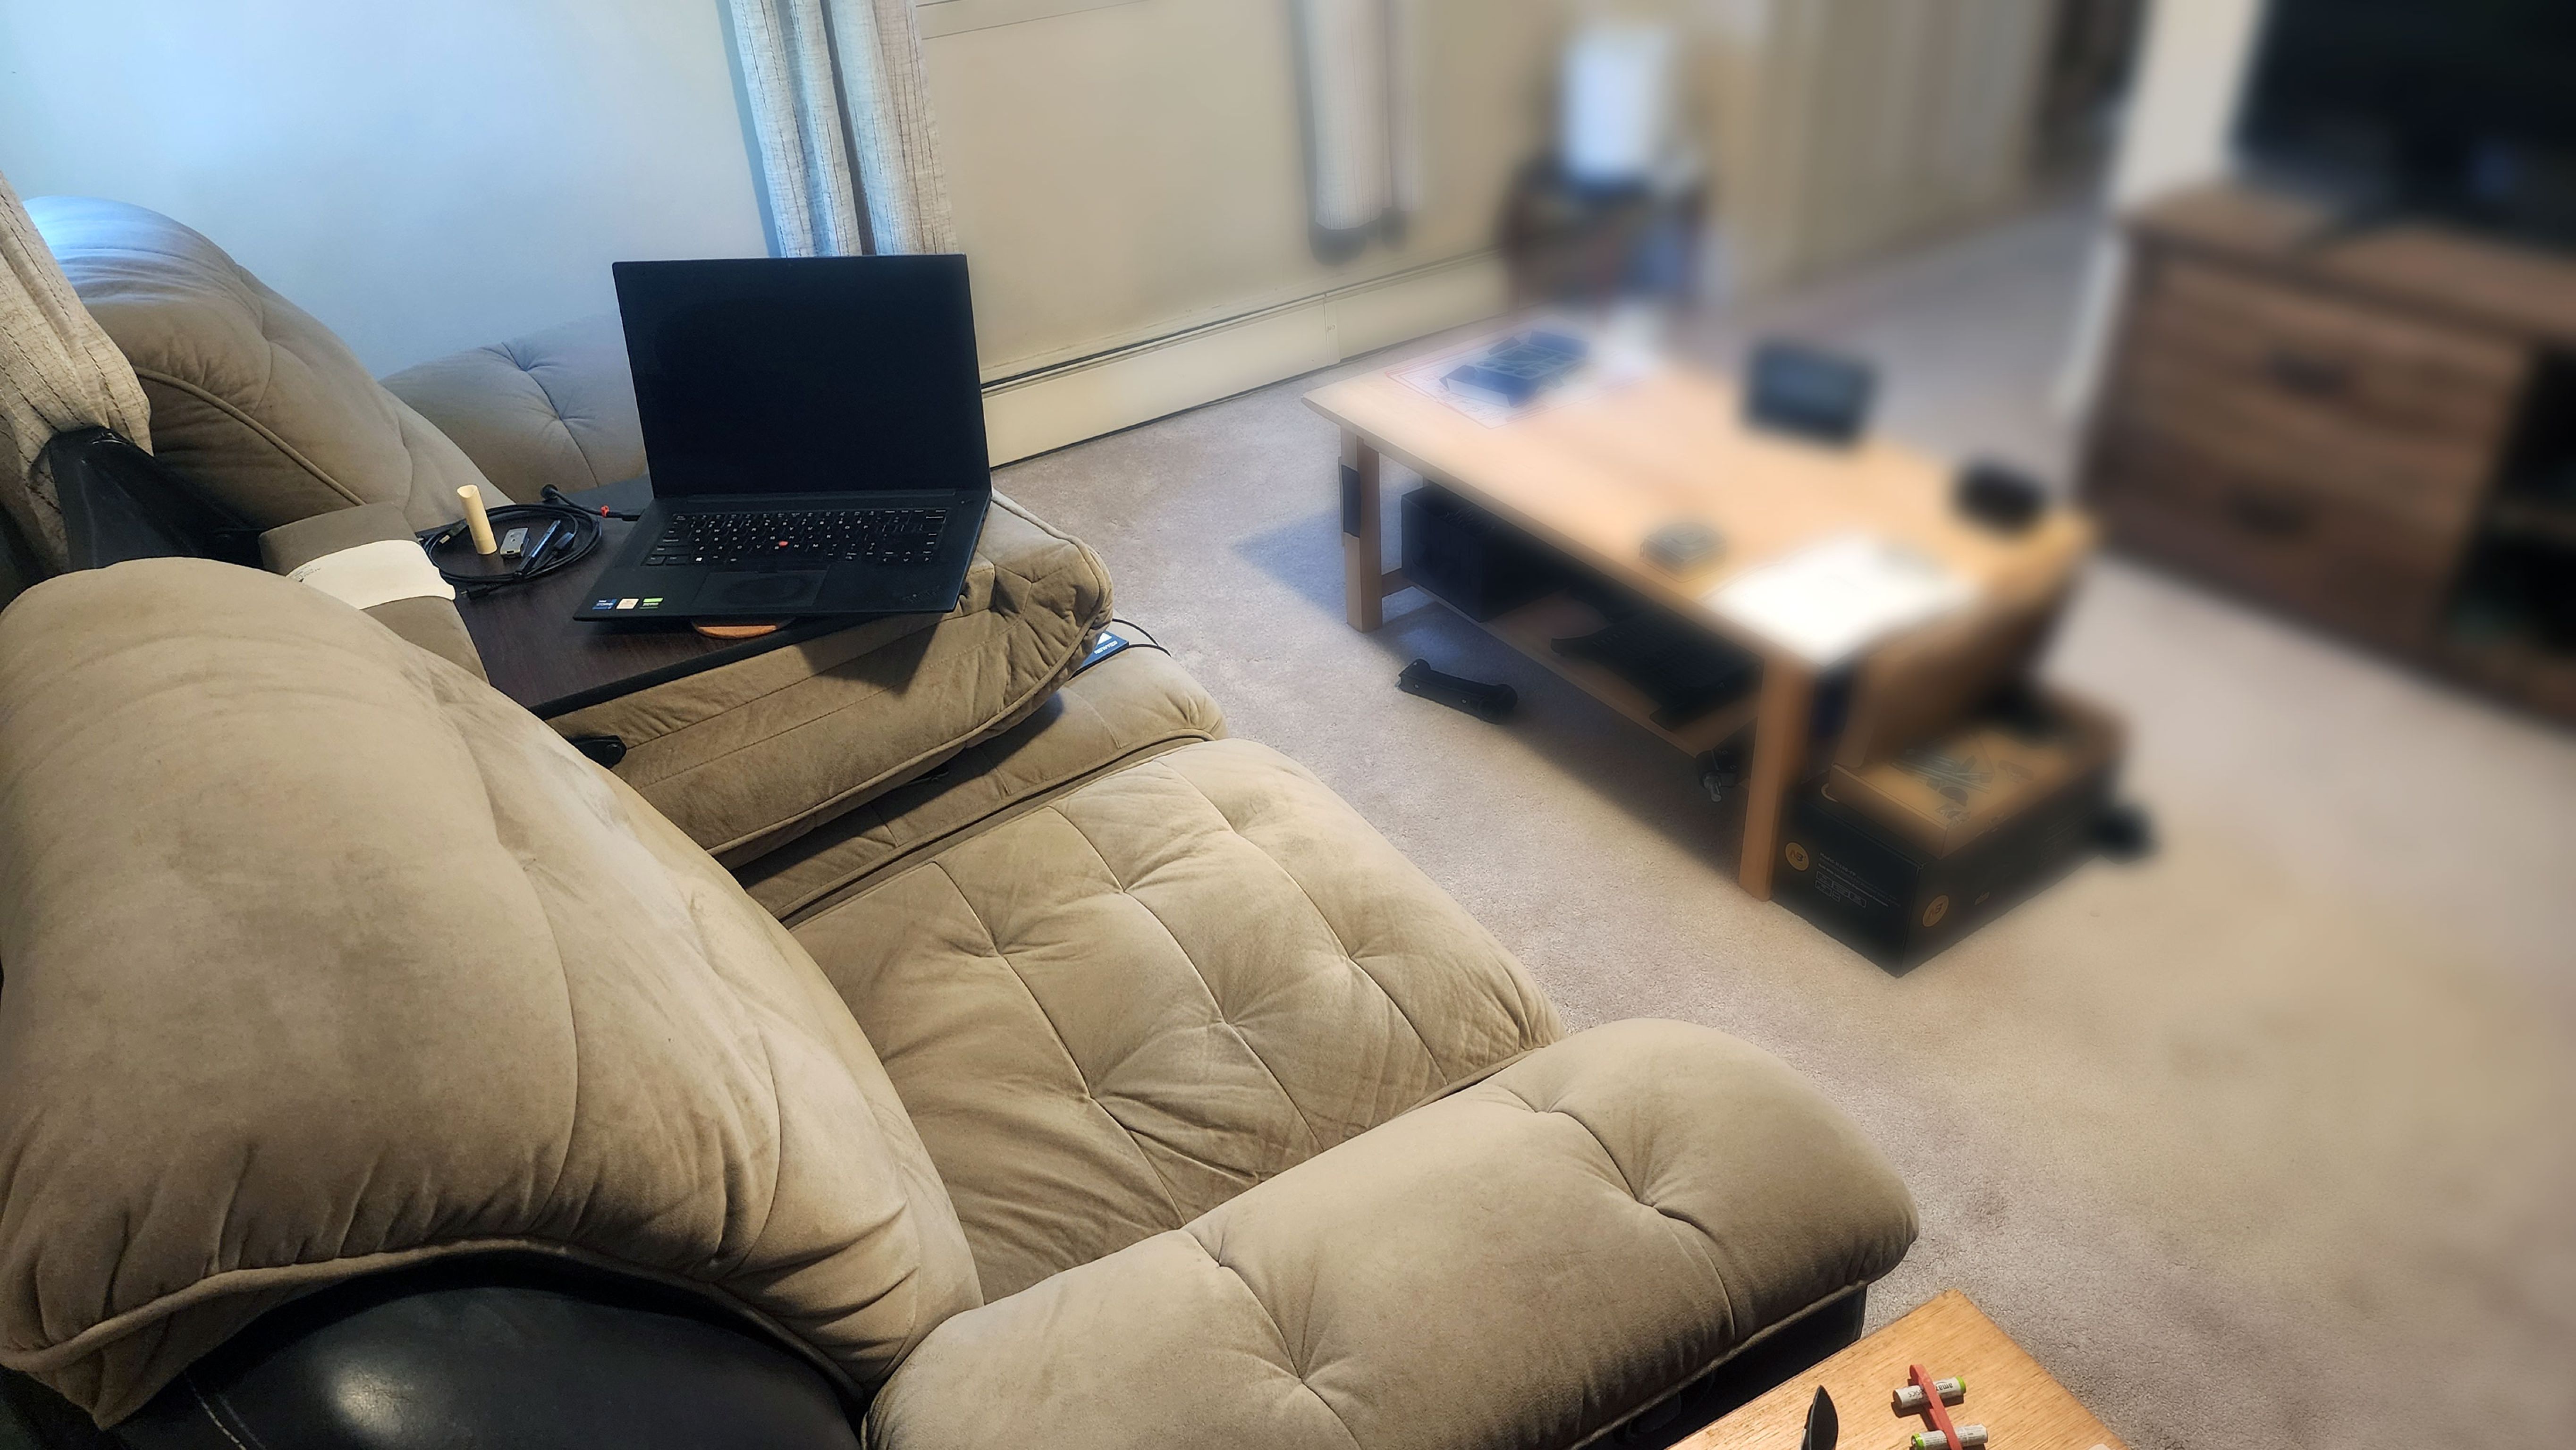
For a bit over a year, I've had my laptop sitting on this fold out table built into the middle seat of my sofa. It's okay, but it's not great. It's a bit too far to the side and too far back to make usage really comfortable and practical. For a while I've thought about mounting an arm that would hold the laptop in a more adjustable and flexible place. I finally did something about it, with the commercial arm arriving just yesterday. With it in hand I saw exactly how it worked and what size it is, so this morning I started drafting plans for how to mount it. Something made of wood, attached to and/or wedged under the structure of the sofa. I simplified through a few revisions.

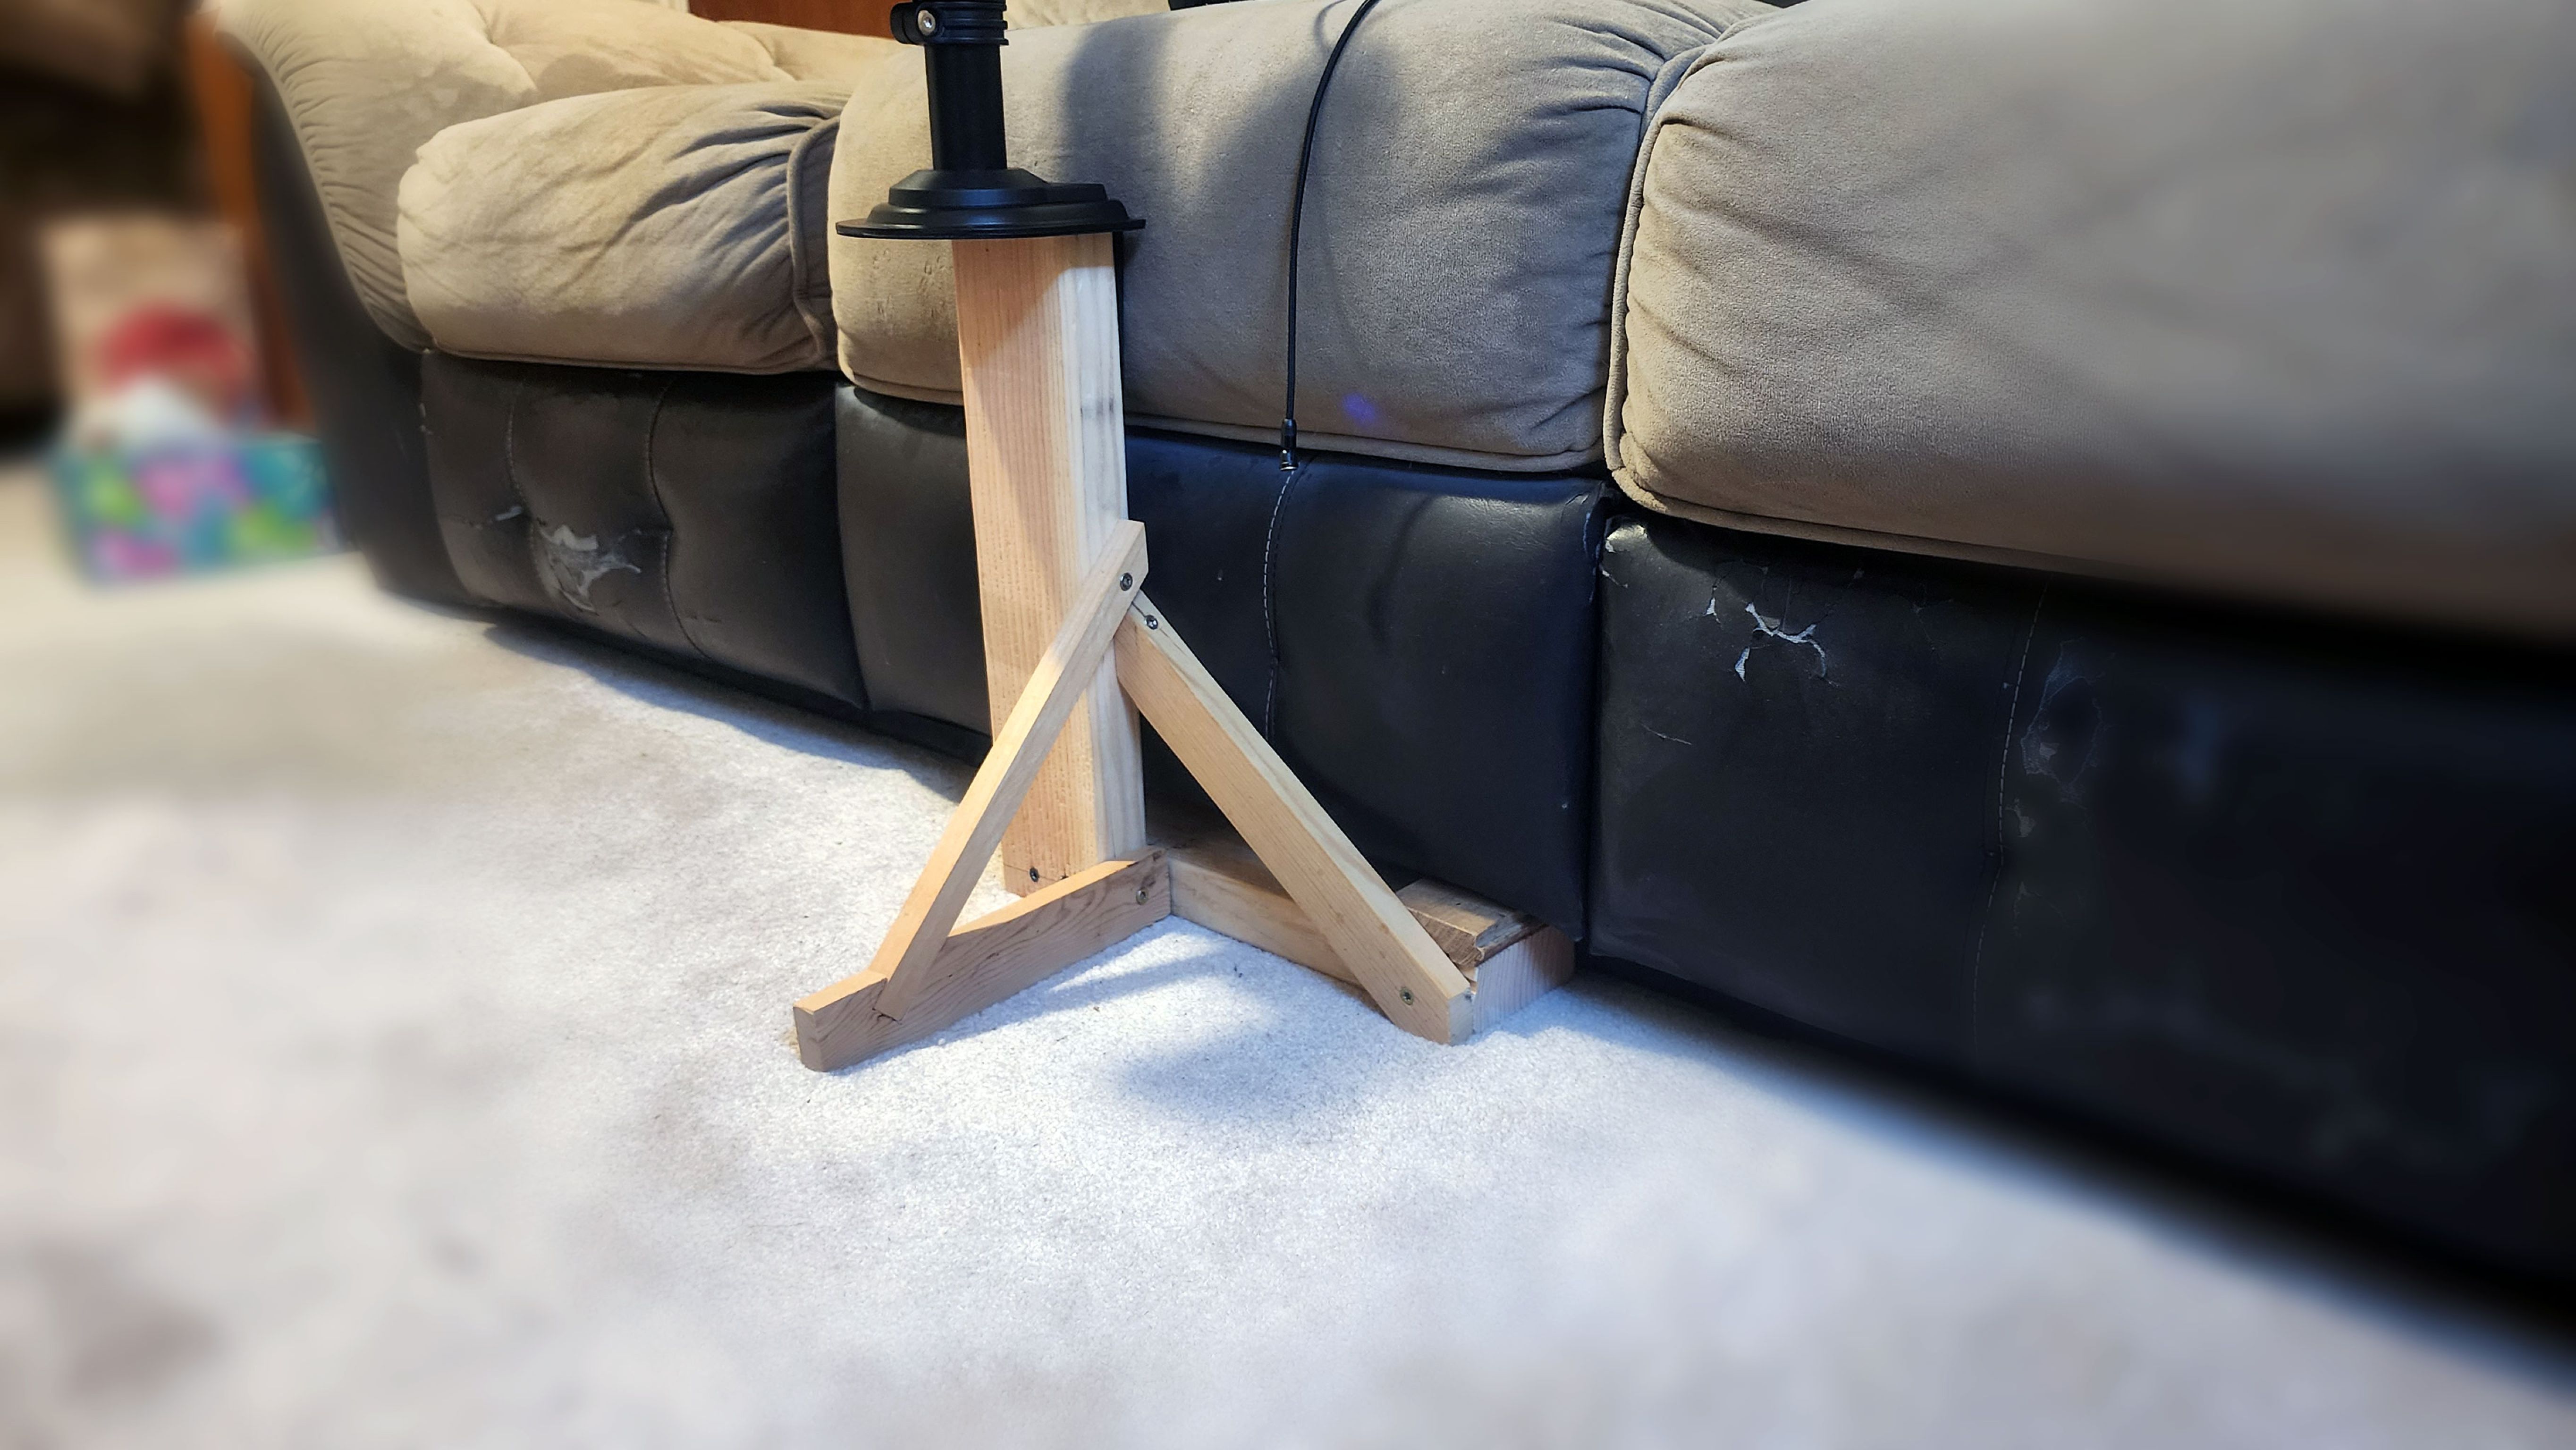
This is what I came up with. It's an L shape, with the arm mounted to the top of the vertical leg, and the horizontal leg fitting under the front of the sofa. The horizontal leg prevents side-to-side tipping by pressing against either the floor or the sofa. A triangular brace makes that reliably strong, and a second prevents the vertical leg from tipping away from the sofa. The L part was designed somewhat carefully, while the rest was just made to fit. Everything was material already available in the basement. A C clamp is hidden by the triangular brace, holding the horizontal leg of the L to the sofa's metal frame.

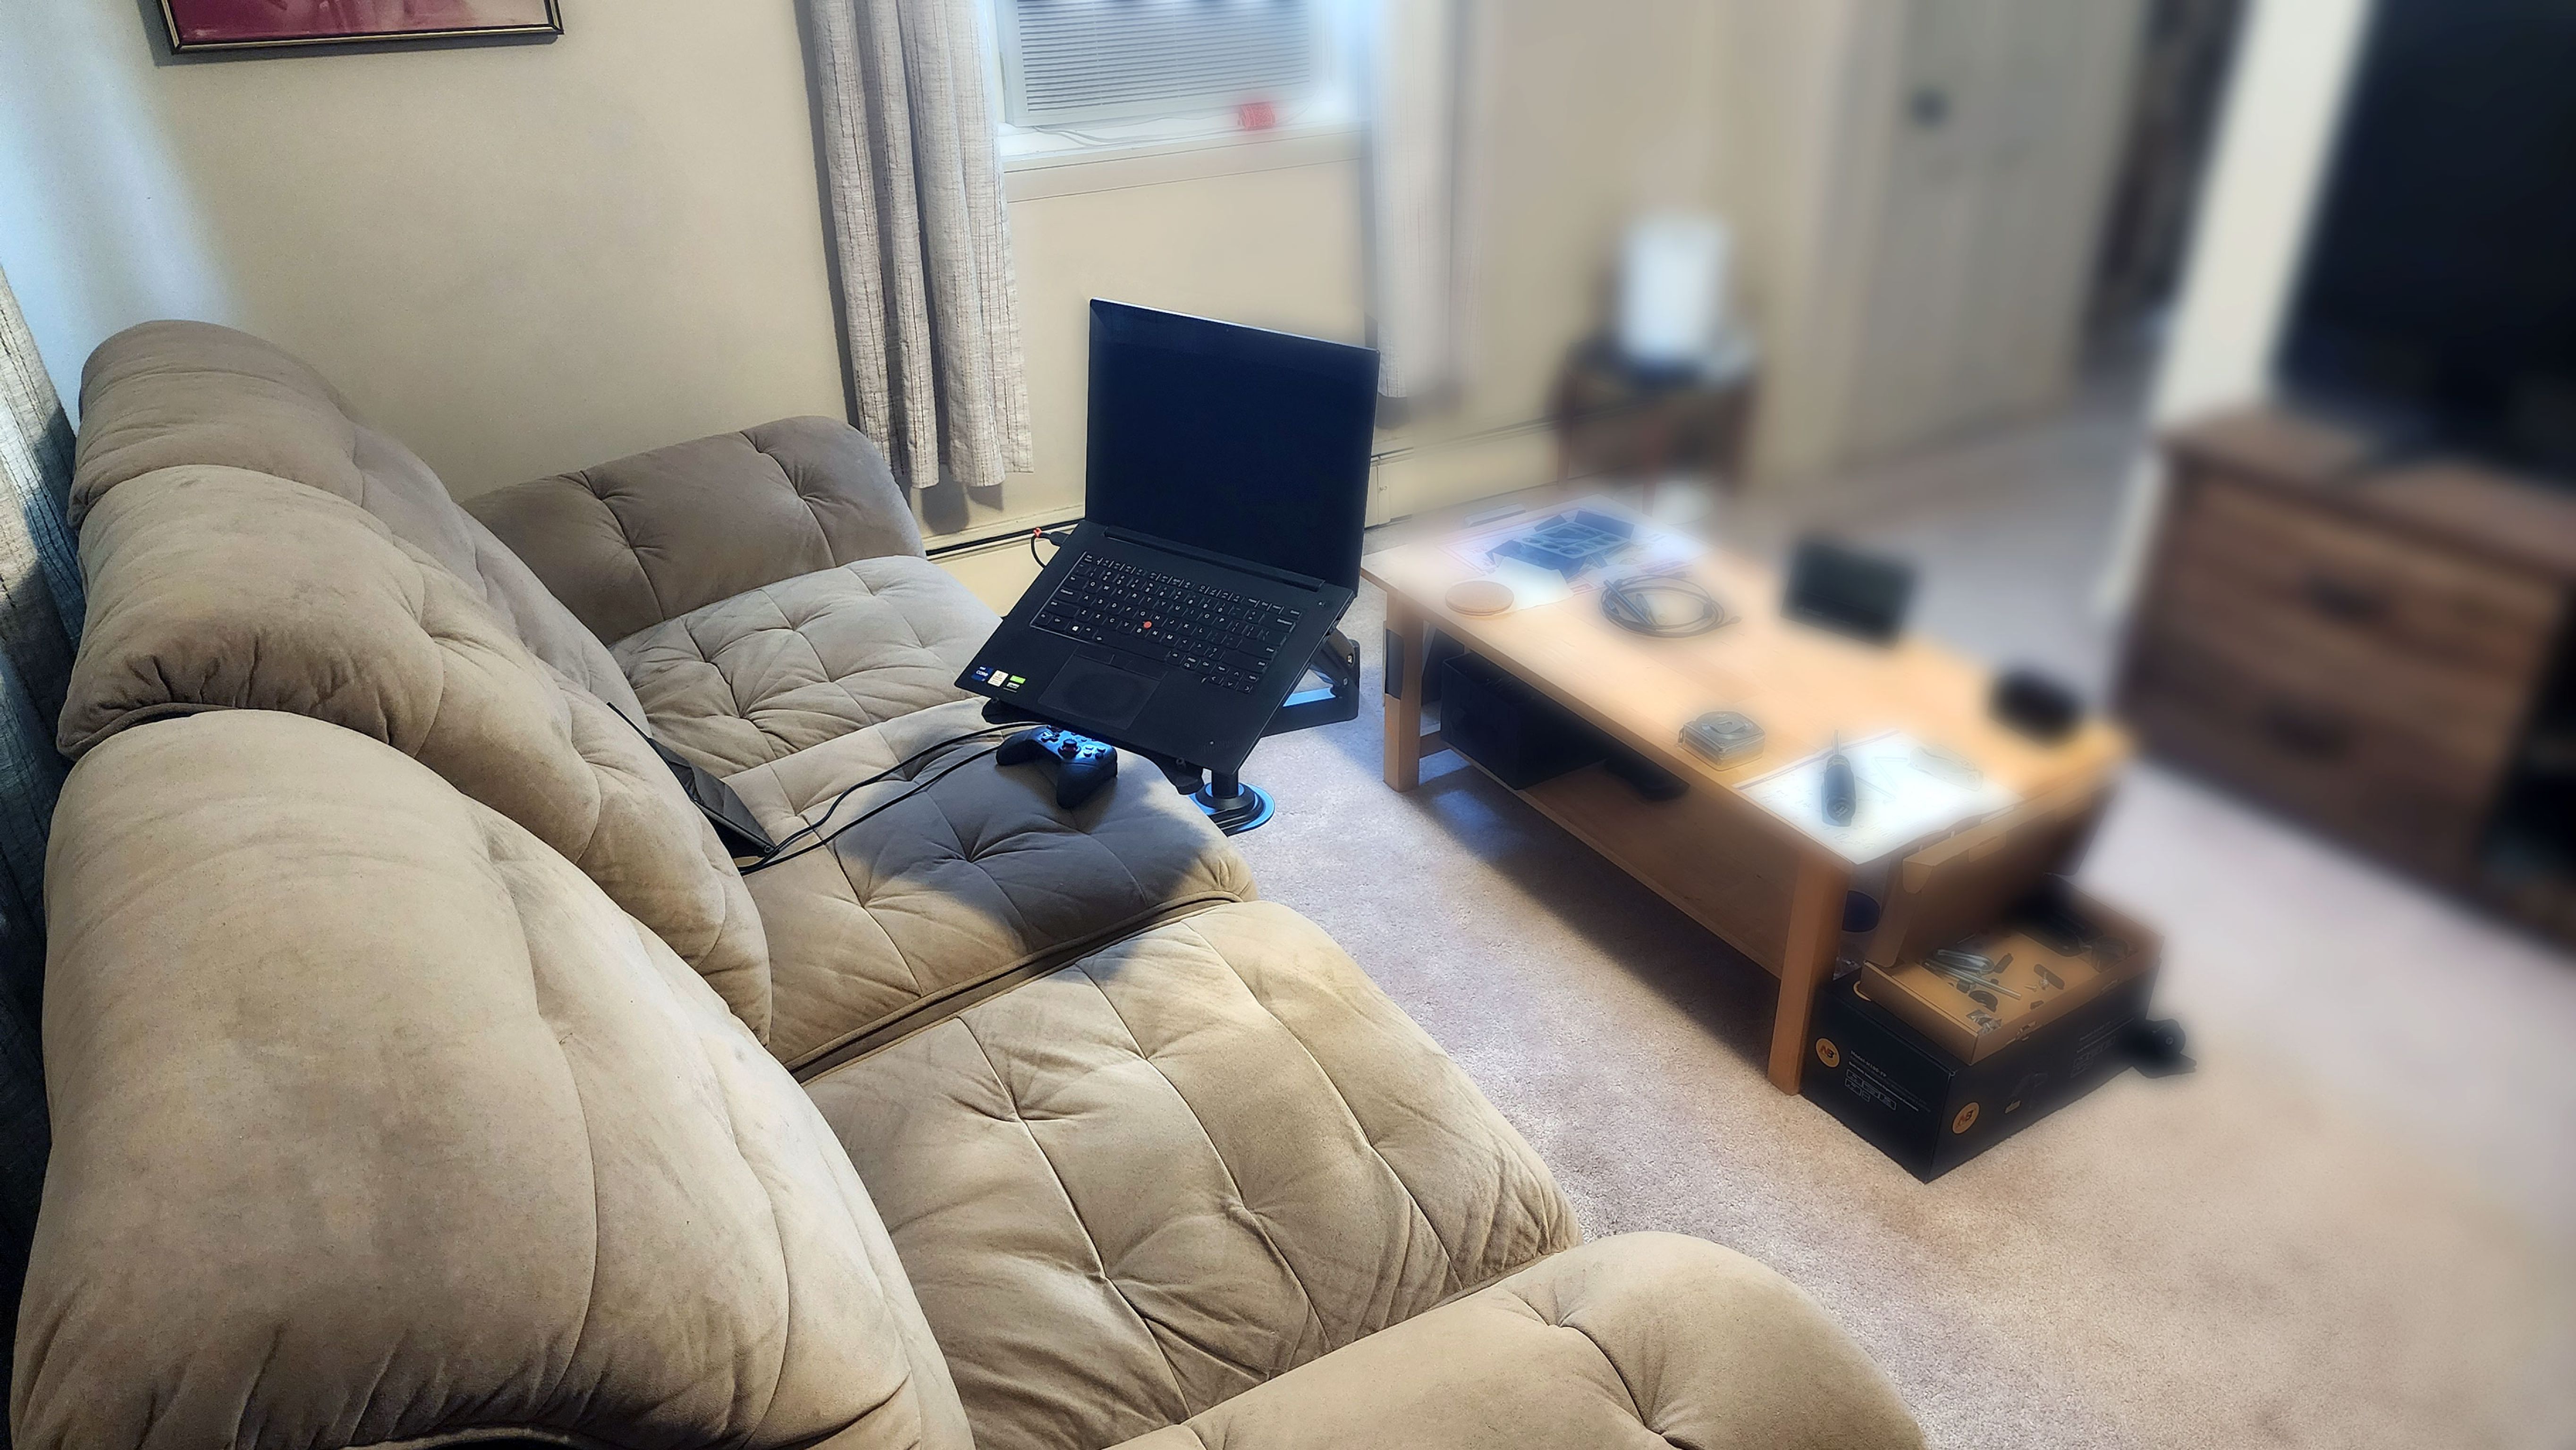
And here it is. I can pull the laptop almost down into my lap and push it further away from me, with very little effort. I've got pretty much exactly what I was hoping for.
2023-05-22 09:33 - Making
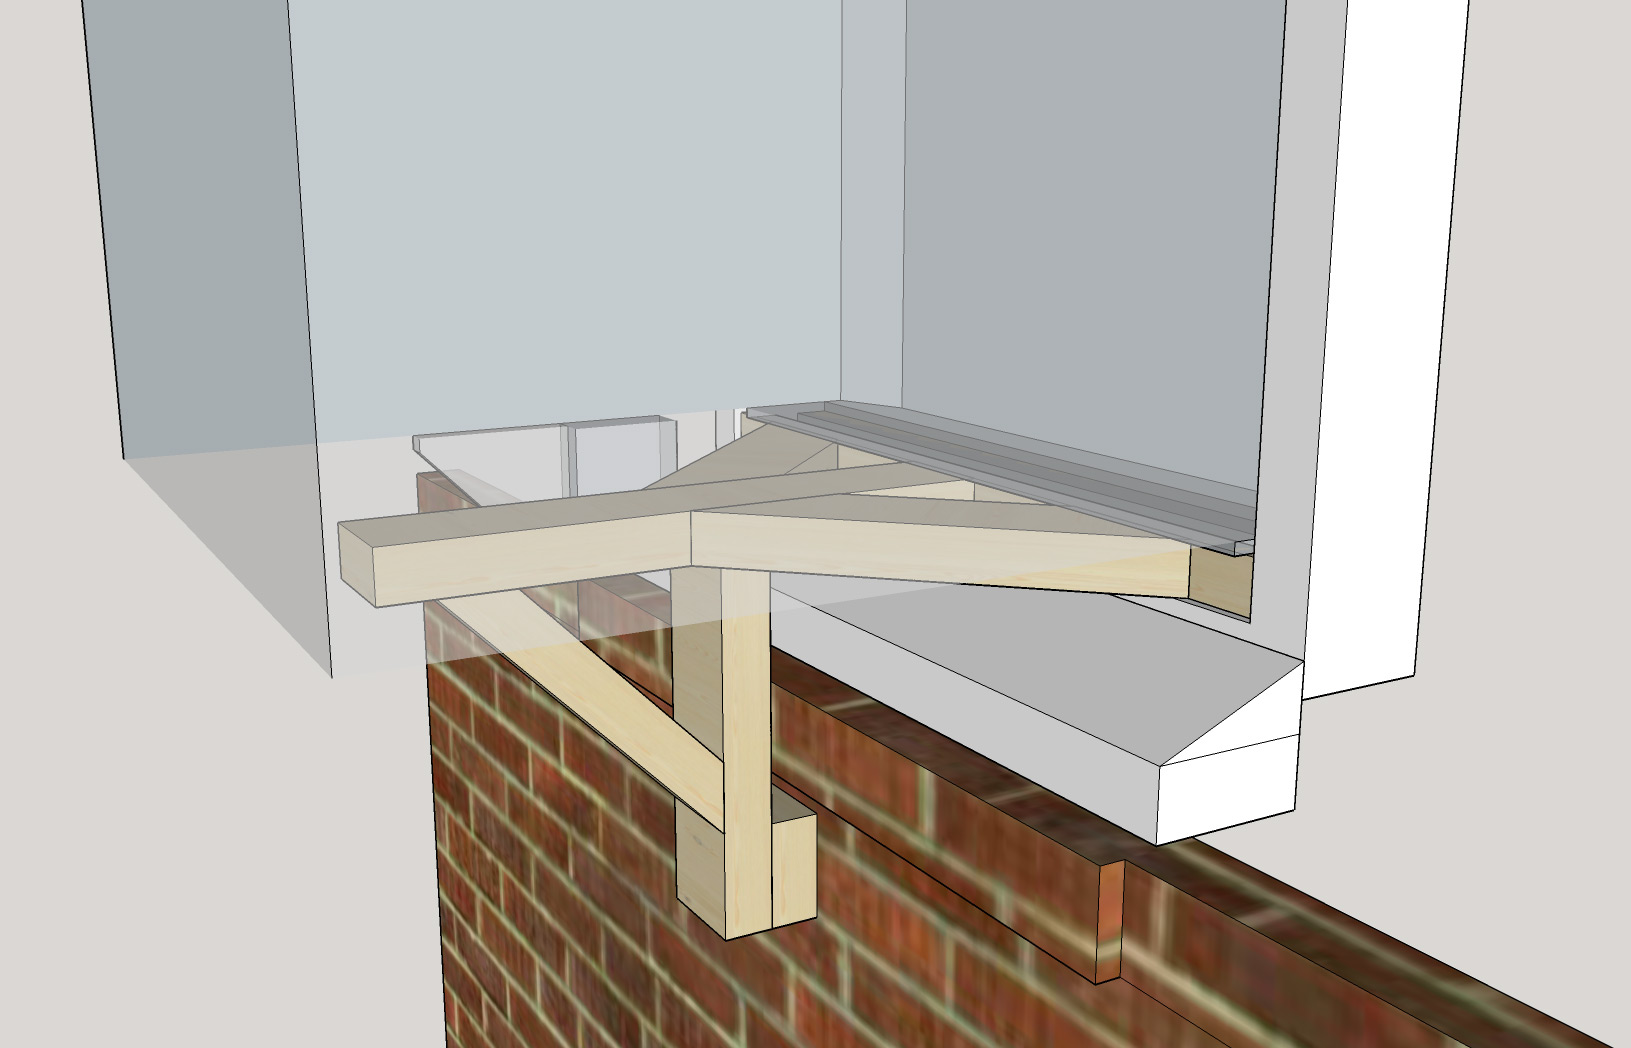
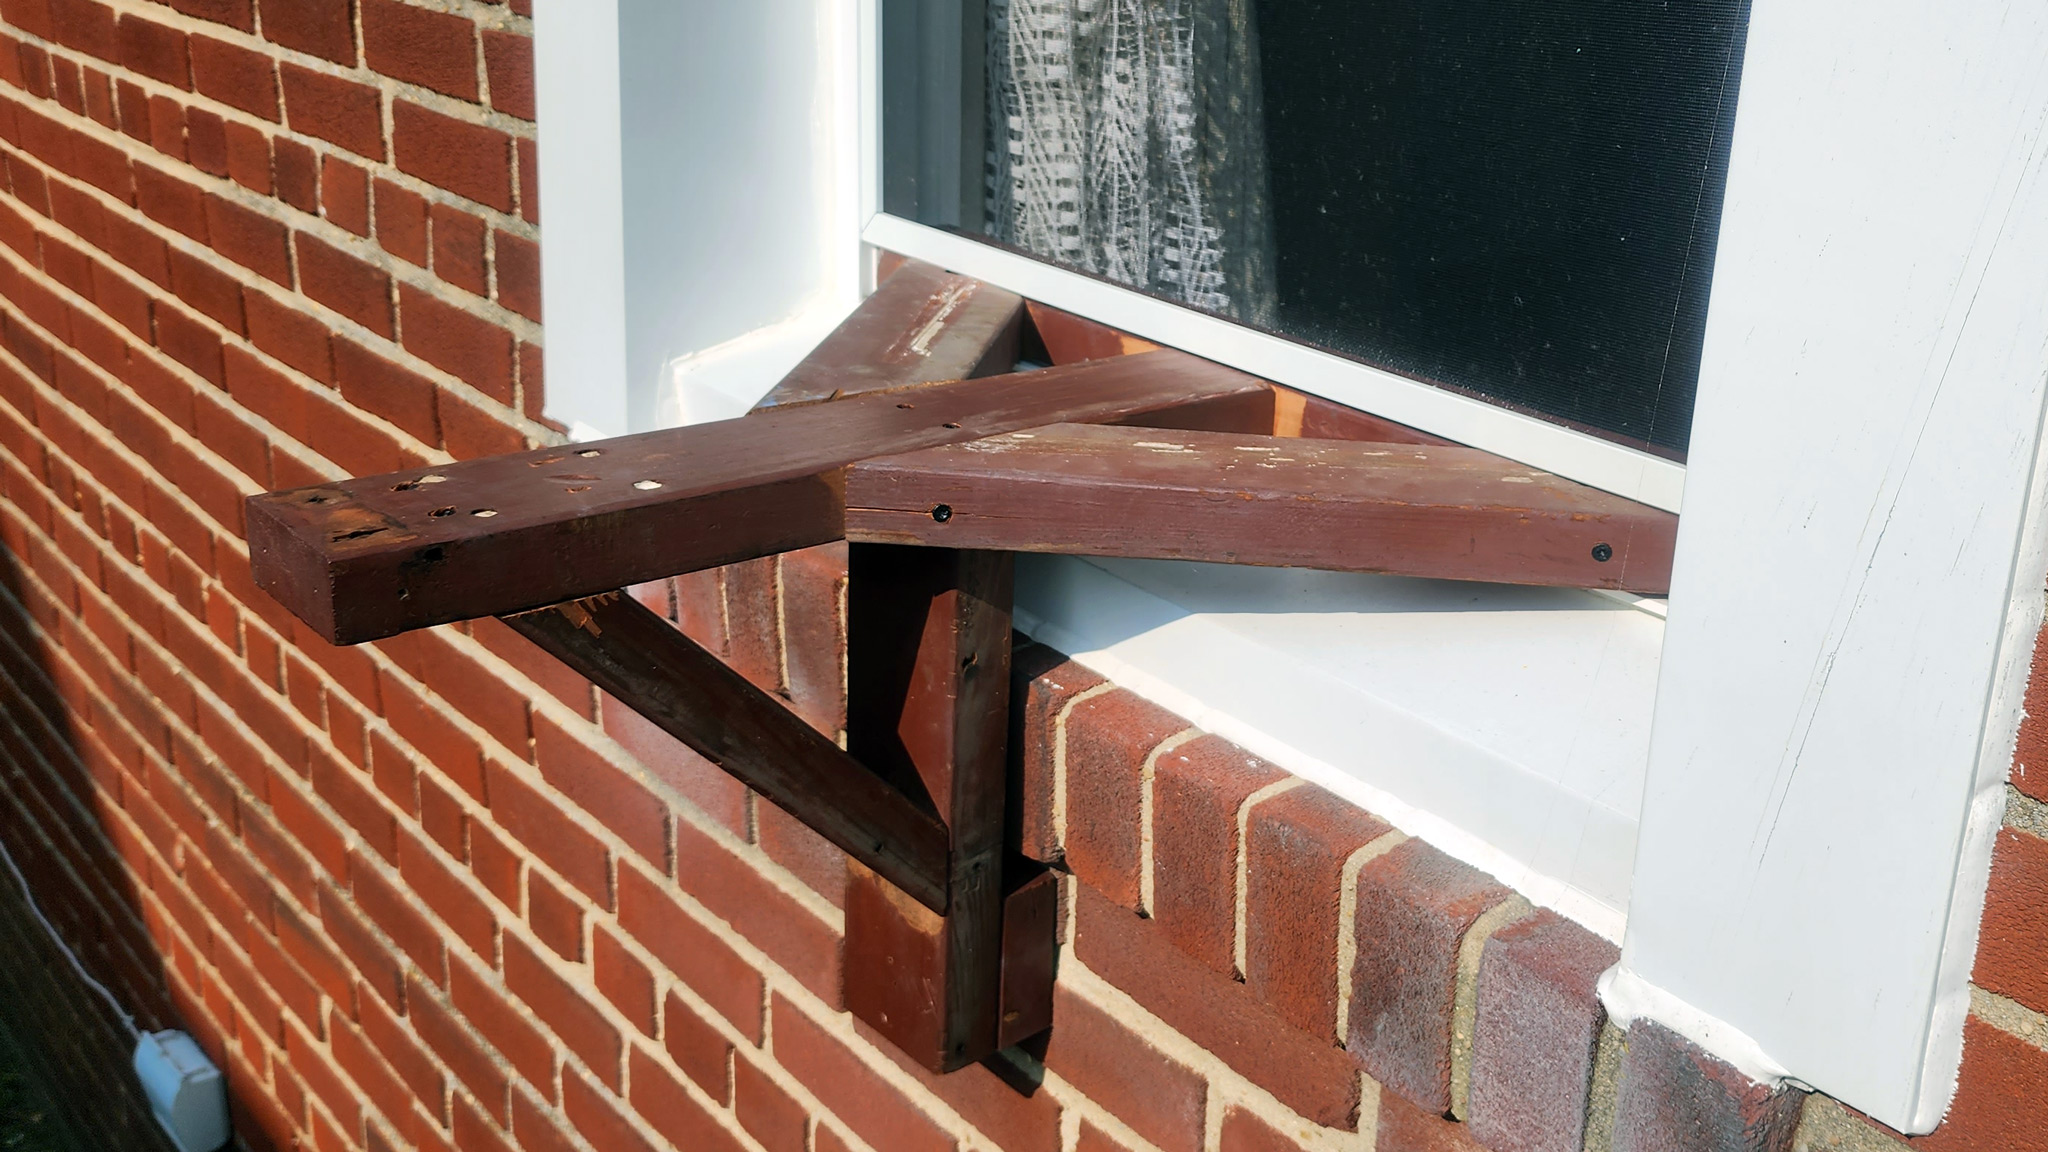
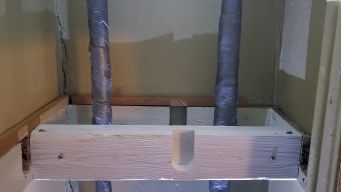
When I moved in here, the house still had the original single pane windows from the 40s installed. Not only did that merit attention, there was historically only a single air conditioner in the whole house — installed in the one window that had been replaced with a more traditional double-hung arrangement, to fit the A/C. And since it was responsible for the whole house, it is a big unit! Very early this year, we had all the windows replaced. That means they're "replacement" windows. Rather than being built into the house (i.e. "new construction" windows) they're designed to fit into the existing opening. Which means some of the structure of the window moves inward, to what used to be window opening. So, this one important window opening is now in a slightly different place, and the existing support structure won't hold up the existing A/C correctly. Given that it's such a big one, I wanted to be sure that we can hold it up well. So I came up with a design.

It starts with a 2x4 cut into a complex shape to fit around all the bumps and tabs in the window frame plus a bit at the bottom of the A/C which sticks down. Attached to that is another which sticks straight out, two to brace it, and then another which sticks down. This final one has both a triangle brace and an extra foot to reach around the brick window sill down to the main exterior wall of the house.

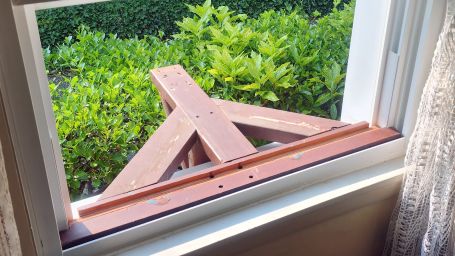
Here it is. It was built from reclaimed wood which used to be a bench. It's not the prettiest, but it will be underneath the air conditioner, so it doesn't need to be. It's full of extra holes, but that's OK. It's also wood from a product meant to be outside. I'm not sure what kind of wood, but it's reddish. I could believe cedar, either way it should stand up to the elements OK. Some of the building was done a bit freehand, but with the key sizes measured it came out extremely close to my original design. I can pretty well hang myself off it, so I'm sure it will hold the A/C up just fine.
2023-04-16 19:51 - Making

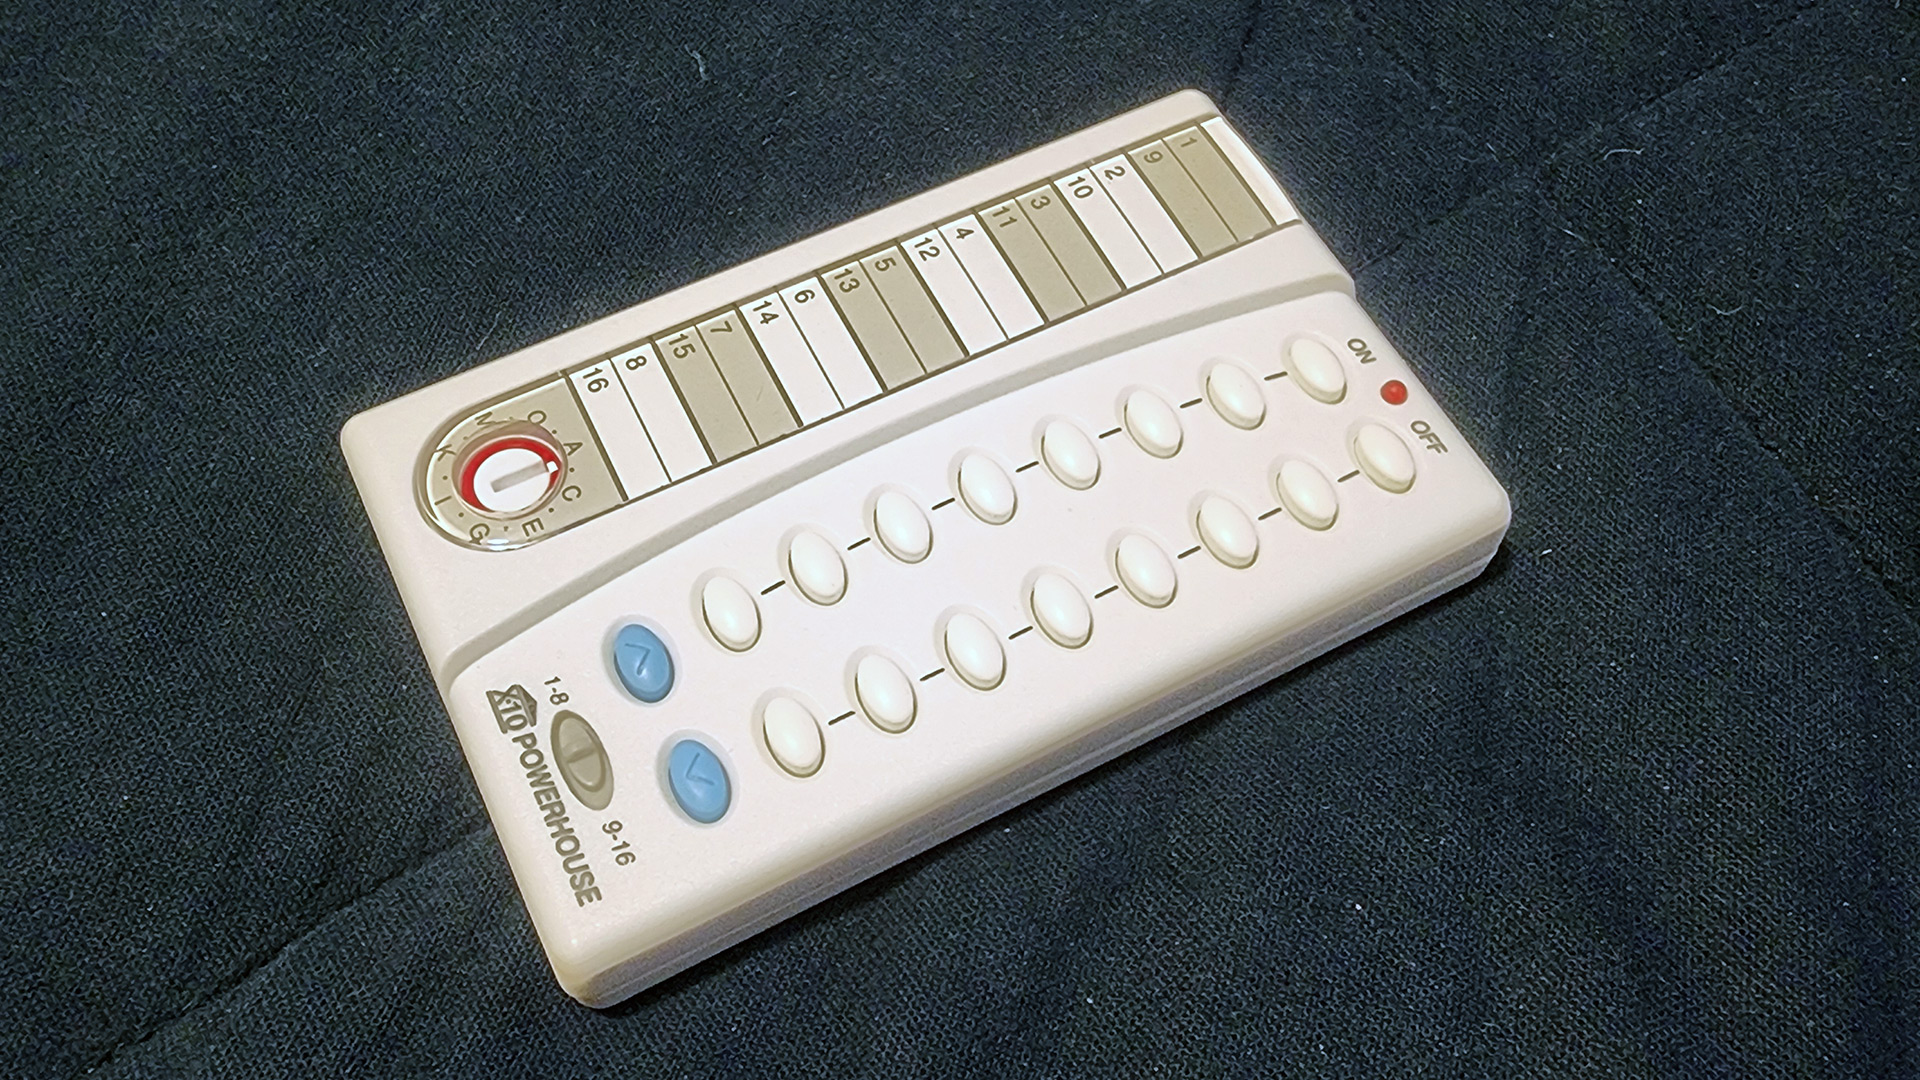
As I mentioned recently, I'm working on "smarting up" power control at home. Back in my co-op apartment I had a fully X10 based system, and I still have many of the parts for it. An important one is the HR12A PalmPad Remote Control. For those I've looked at, remote controls are either missing or terribly expensive for modern "smart" home systems. The link shows that a still brand new one from X10 is only $17, and it has both on and off buttons for eight devices, plus a switch to control another eight, plus a dim/bright control. The closest thing I can find (they're hard to find!) is an YoLink Remote which only controls five devices and costs $30 (and probably only works with their proprietary system).
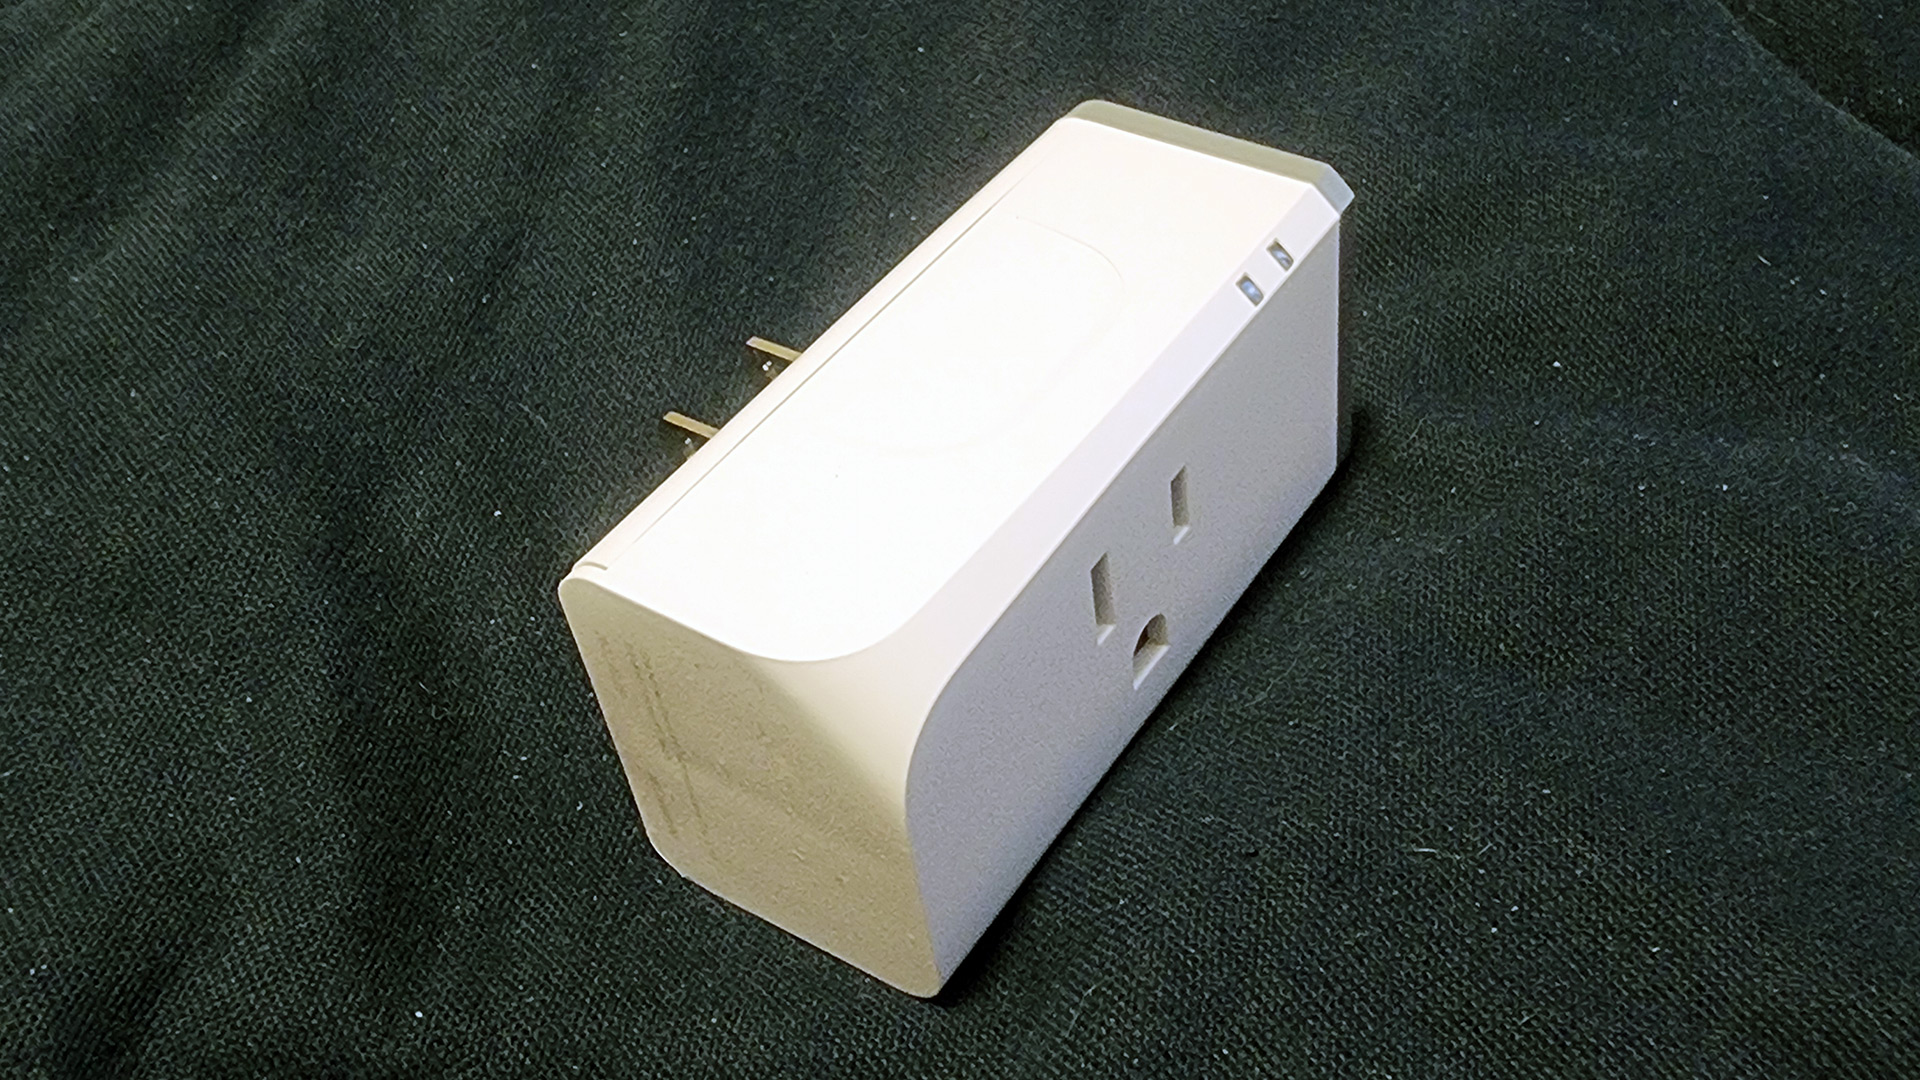
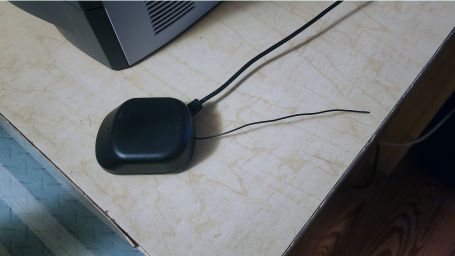
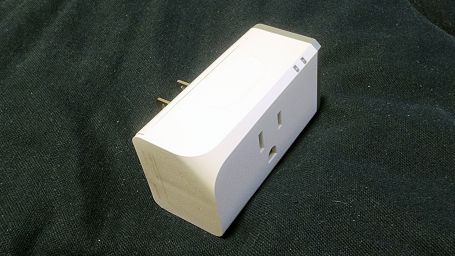
This pairs with the CM19A USB PC Transceiver which can both receive and send RF X10 signals. I previously used this to send X10 signals, via my home server. I've reworked that now: it's only receiving. The PalmPad remote sends signals when I press buttons and the server receives them via the CM19A. It then generates network requests. So far to the fan/light control I mentioned earlier and to the last thing pictured: A Sonoff S31 "smart switch".
Since they're cheap and I already have several: now it's easy to leave one PalmPad by the couch, one by the desktop computer, and one near my bed. If I'm planning to head to bed? I can turn the light and/or fan off in the living room, and the light on in the bedroom. Without extra trips back and forth, and without fumbling around in the dark. And I've got five more buttons to assign, without even flipping the switch! I can send the same controls from a computer/tablet/phone through the little web app running on my home server. I've barely had it a day and I already greatly appreciate being able to easily turn the ceiling fan on or off as I please, without getting up.
2023-01-02 09:57 - Making
A while ago I made "The Bedsofa", a sort of headboard designed like the back of a sofa, for comfortable sitting up (and reading) in bed. When I made it, I was living in a loft apartment, and it was designed to work with the mattress sitting right on the floor. (The loft was around four feet high, no room to put the mattress up on a real bed, there.
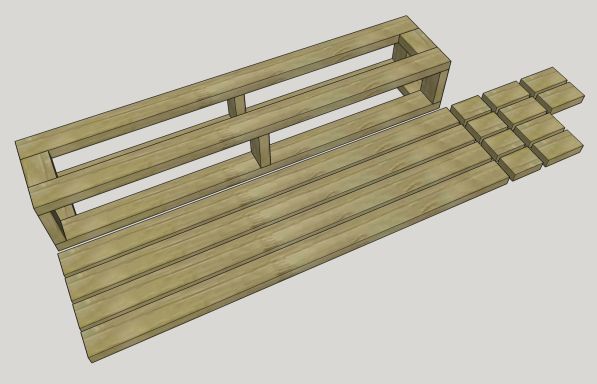
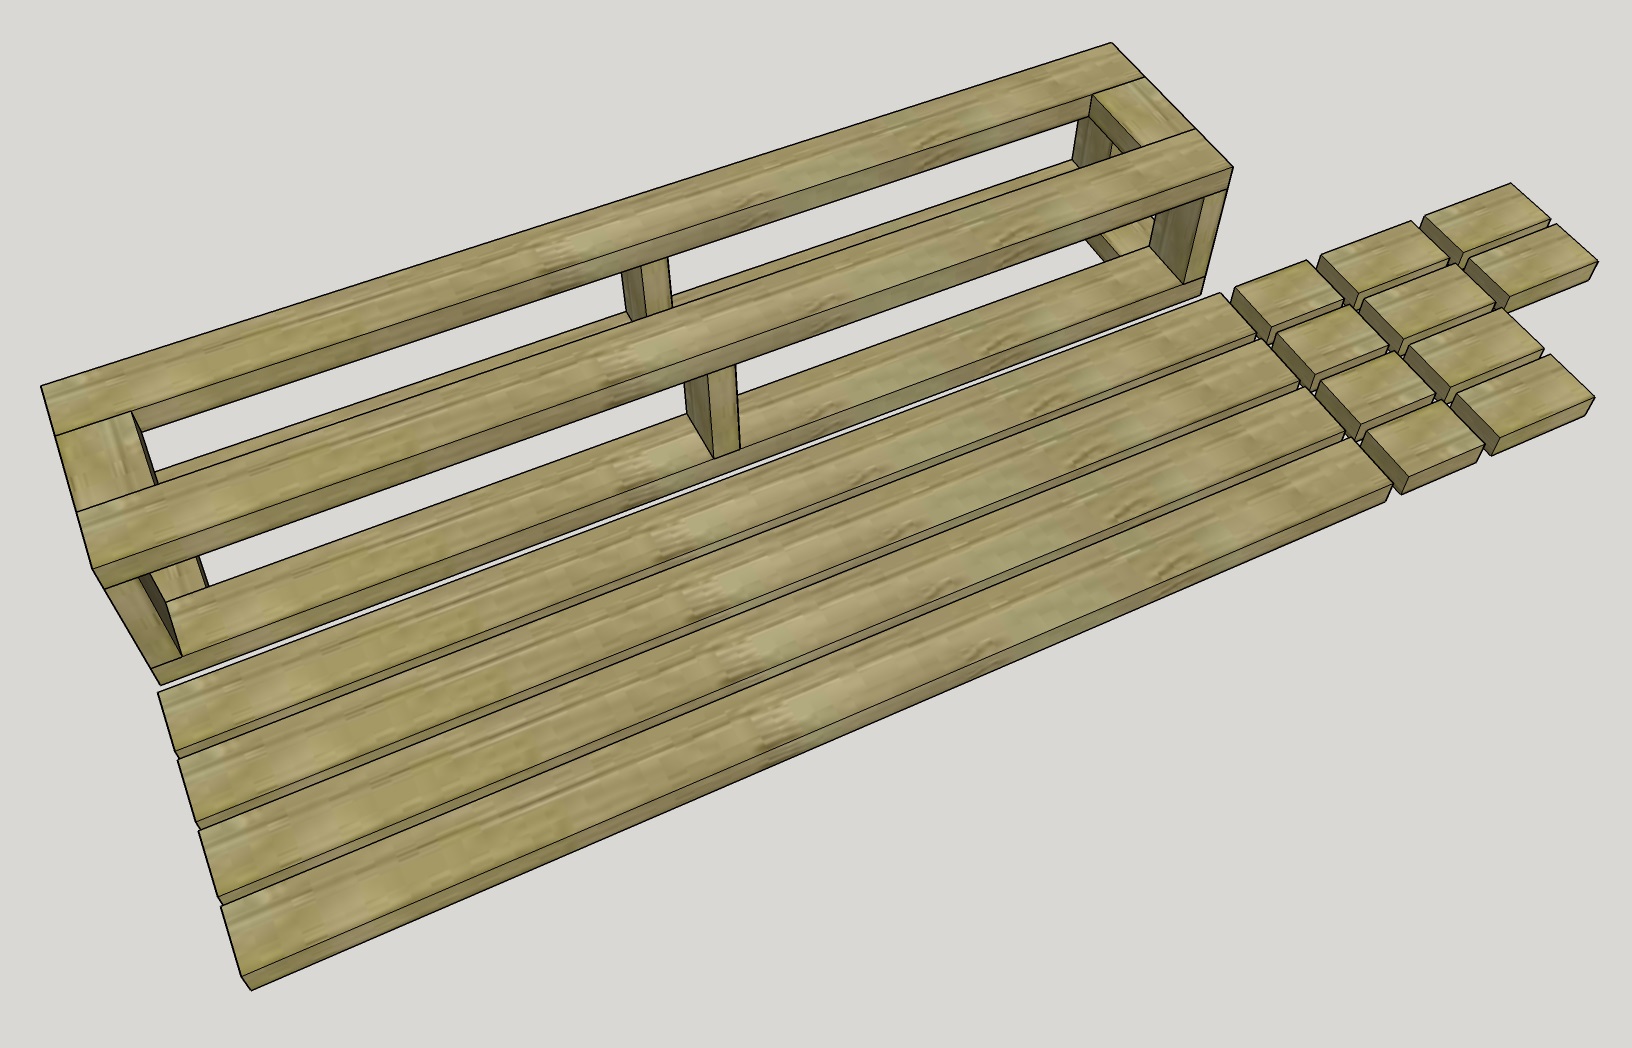
The riser I've designed, plus an "exploded view" to plan how many boards will be needed to build it.
So this is the plan: a simple little frame, to raise the bedsofa the same amount that the bed frame will raise the mattress. Almost. My original design didn't work out perfectly so the cushions hang a bit lower than intended. Raising the bedsofa a little bit less than the mattress will make those sit up where they were originally intended. So this will be ten inches tall, while the bed frame is twelve.
I've still got the rest of the material I upholstered the bedsofa with, so this riser should blend right in. Now I've just got to figure out the best way to get some two-by-four boards home!
2022-12-31 21:38 - Making
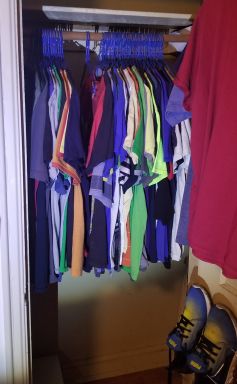


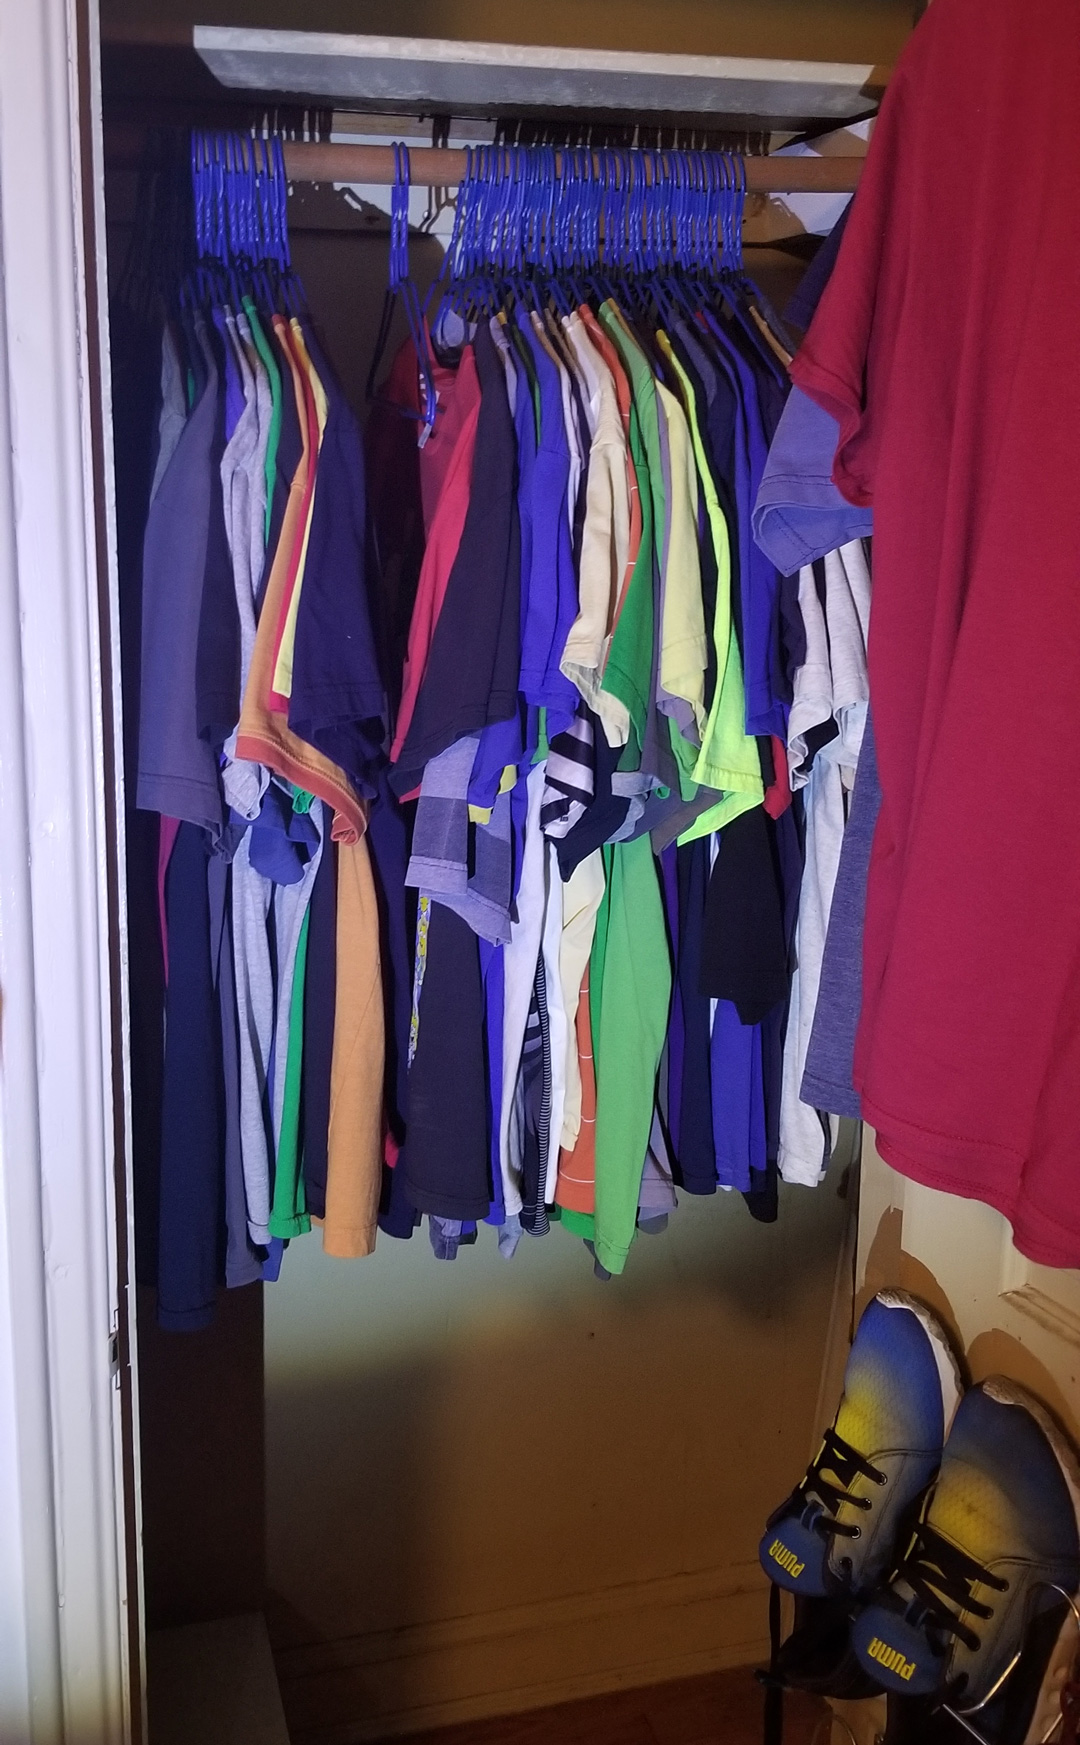
I moved almost exactly a month ago. The bedroom closet has a unique closet rod situation: self made hangers, from 1x4 lumber, around the perimeter of the closet. Since the closet is shallow but wide (I guess), they were installed to allow either two front-to-back closet rods on the sides, or one across the width. But the long closet rod in there isn't long enough to reach the hangers on either side, and the width is much more than double the depth. I'd like to use the long closet rod, but I can't as-is.
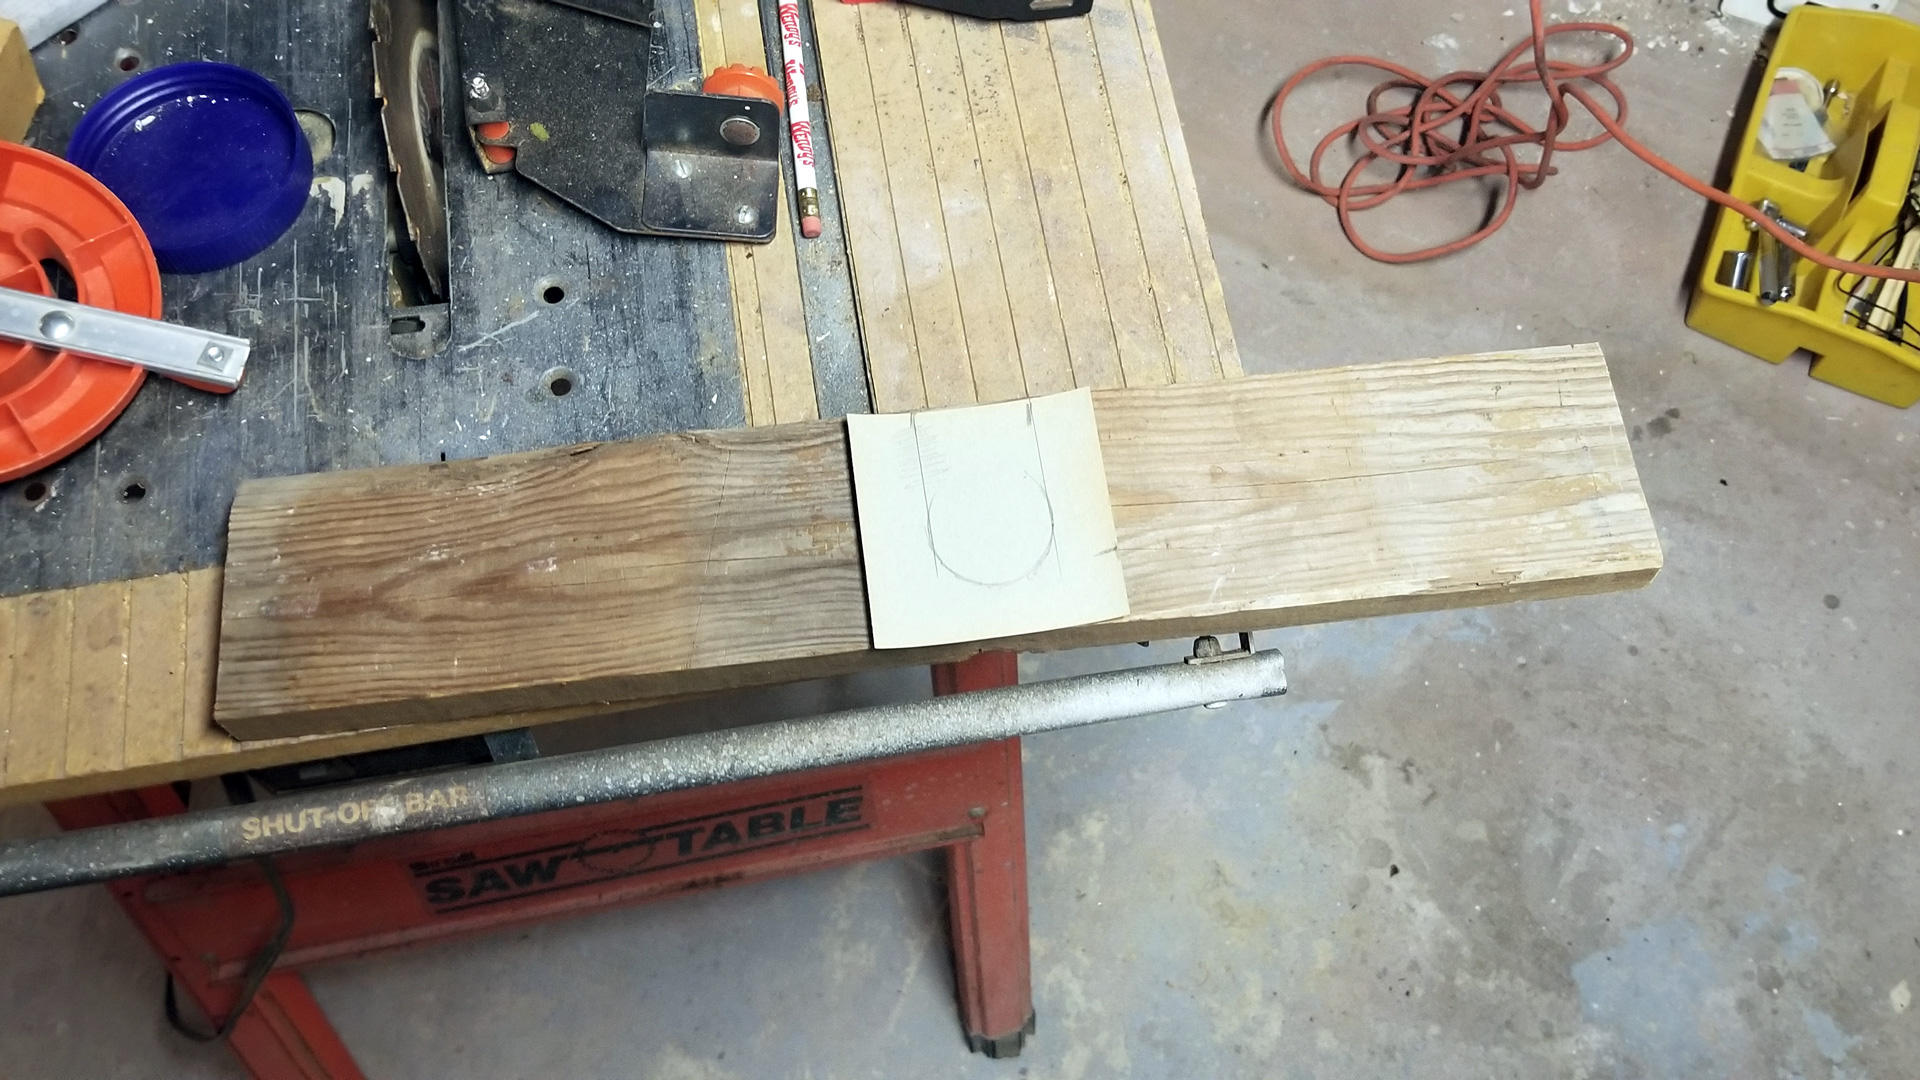
There's also some pipes feeding the radiator upstairs, tucked on one side. So the solution seemed to be to build a new hanger in the right position to support the existing closet rod, plus avoid the area with the heating pipes at the same time. I started by cutting a board to length, and finding the right shape hole to match the one already in place. I cut a second board the same length, to be a backstop so the rod can't slide and fall out.
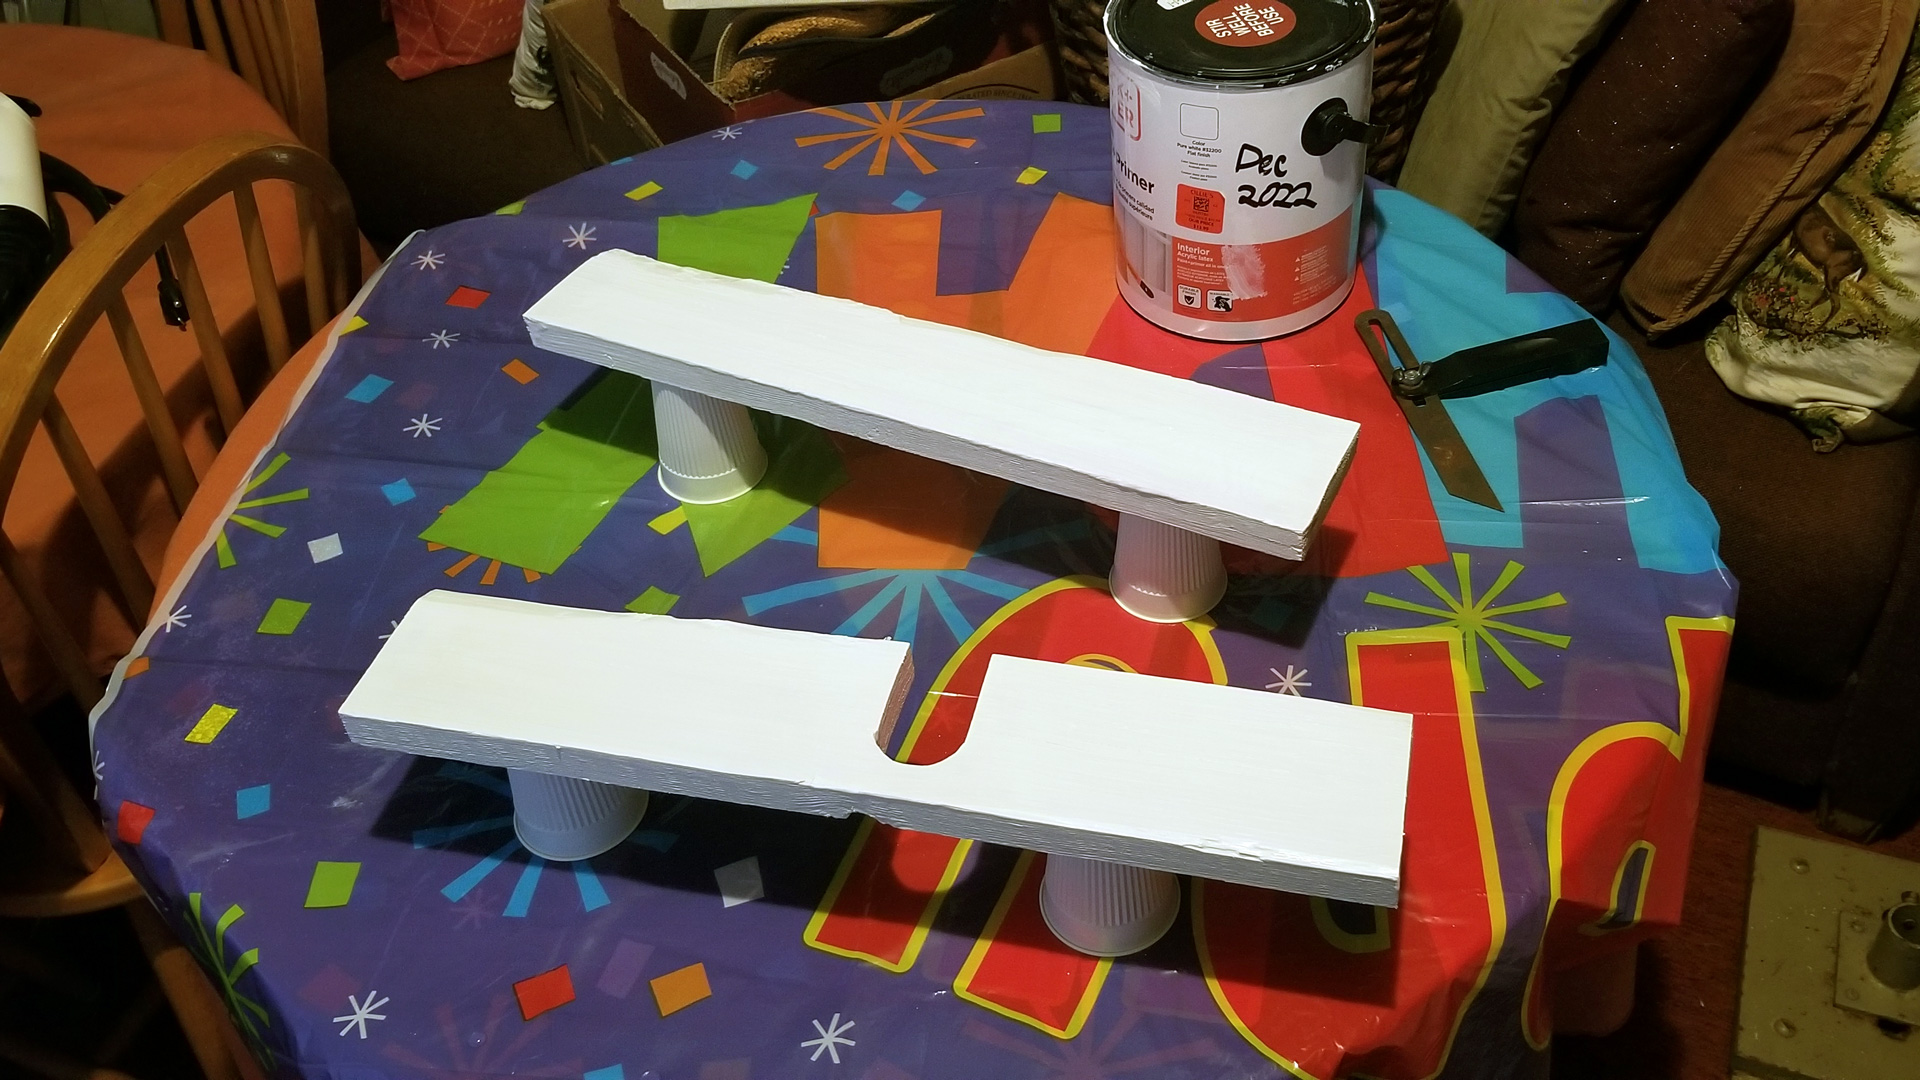
Once cut, the boards were painted white to better match what already existed in the closet. Four "toe-screwed" screws support the main board, with the cutout, from each corner. Two screws go through the face to support the backstop board from there. Once installed, you can see the preexisting hanger already along the wall, which the rod couldn't reach.
2022-02-13 12:48 - Making
I had to do laundry, and I was out of funds so I had to trek to the basement to recharge my laundry card. While there, I passed the electronics recycling bin. I spotted a nifty looking two-outlet four-USB power strip. Sometimes people toss things that are perfectly working. This one was not.
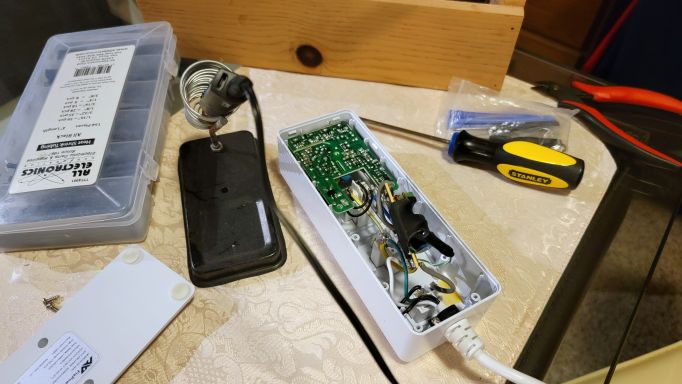
But it looked pretty nice, so I took the time to look into it. First I tried the USB ports, nothing. A little dot on the front looked like a status light, not lit. Then I tried the AC outlets: those also didn't work. At this point, it was time to open it up. There were two visible screws on the bottom, but that wasn't enough. There were two more screws, under two of the four rubber feet. Then some plastic clips holding the base on, and I was in. I found a much larger and more complicated circuit board to run the USB ports than I'd expect, and one smaller one.
The smaller board was directly connected to the AC input, one leg via the switch. Once I flipped it out, I found what not only looked clearly like a fuse but also was labeled "F1" on the board. And it was blown. I couldn't see what its original ratings were — this was a little glass fuse, the ratings are normally stamped on the metal ends. I ended up putting an 8 amp fuse in to replace it, from what I already had on hand. Which was a bare fuse, no leads like the original had. So I took some short wires, soldered it in, and covered everything in shrink wrap (like the original) to be safe. You'll have to look close at the picture to see it: it's at the bottom/right of the picture. A large black blob is the original shrink wrapped board. The smaller and closer black blob is the new shrink wrapped fuse, with little green wires leading back to the board.
Once I put the fuse in and closed it up: everything works fine! And of course, the status light is an awful bright blue thing. The hole for it is small enough, but tons of light leaks around the USB ports.
2021-09-09 18:08 - Making
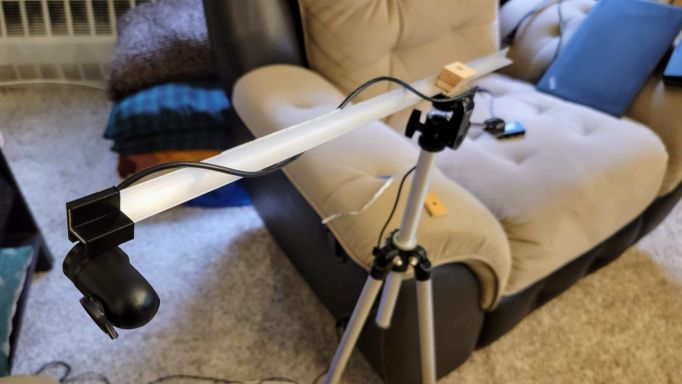
As mentioned earlier, I've been streaming my video game play online. To improve the stream, I've added a webcam to show my face. I've got a (probably?) unusual setup, in that I'm just sitting on my couch, looking at my TV, as I always have while video gaming. No good spot to put the camera. My first try just twist-tied the camera onto the tripod, then aggressively cropped that, to keep just the part that's my face. This moves the camera much closer to me while keeping the legs further away, because they need to be given the furniture layout!
It's a tiny piece of wood, drilled and tapped for quarter-twenty, to attach to the tripod. A matching hole is drilled in a bit of "angle iron" (aluminum, actually) I already had lying around. At the front is a 3D print I quickly threw together which (thankfully on the first try!) friction-fits around the angle and the camera's own mounting knob.
My streaming setup is pretty cobbled together, like this. Which is absolutely fine for now!
2021-05-05 20:15 - Making
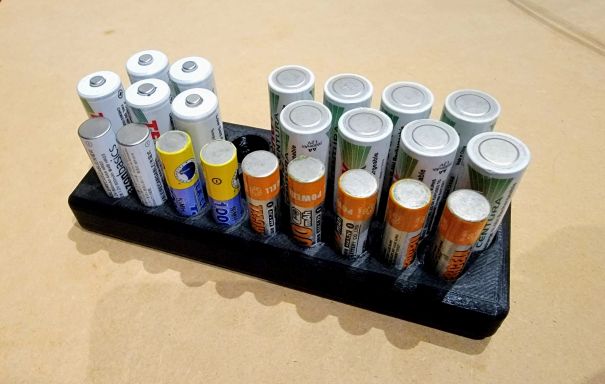
I love rechargeable batteries. Much cheaper over time, and more convenient: it's pretty easy to keep a few charged and ready, and thus never need to worry about running out or getting more. For a while I had two little plastic buckets (old takeout containers!) to hold charged and used batteries each. But that's still a bit messy, and doesn't allow for even rotation.
It's pretty easy to buy battery holders, but the ones I could find are bulky (almost all including lots of C and D cell slots I don't need) and surprisingly expensive for a little chunk of plastic. So I made my own chunk of plastic! It's just a little box with some circular holes, of the right size to fit AAA and AA cells. I can put them + side up to signal that they're charged, and build a left-to-right kind of plan to make sure I'm always picking up the oldest one to use next, and putting the used ones back in at the "end of the line".